2. Create Roles and assign permissions
Here is a step-by-step guide on managing roles and assigning operation permissions within One Stop:

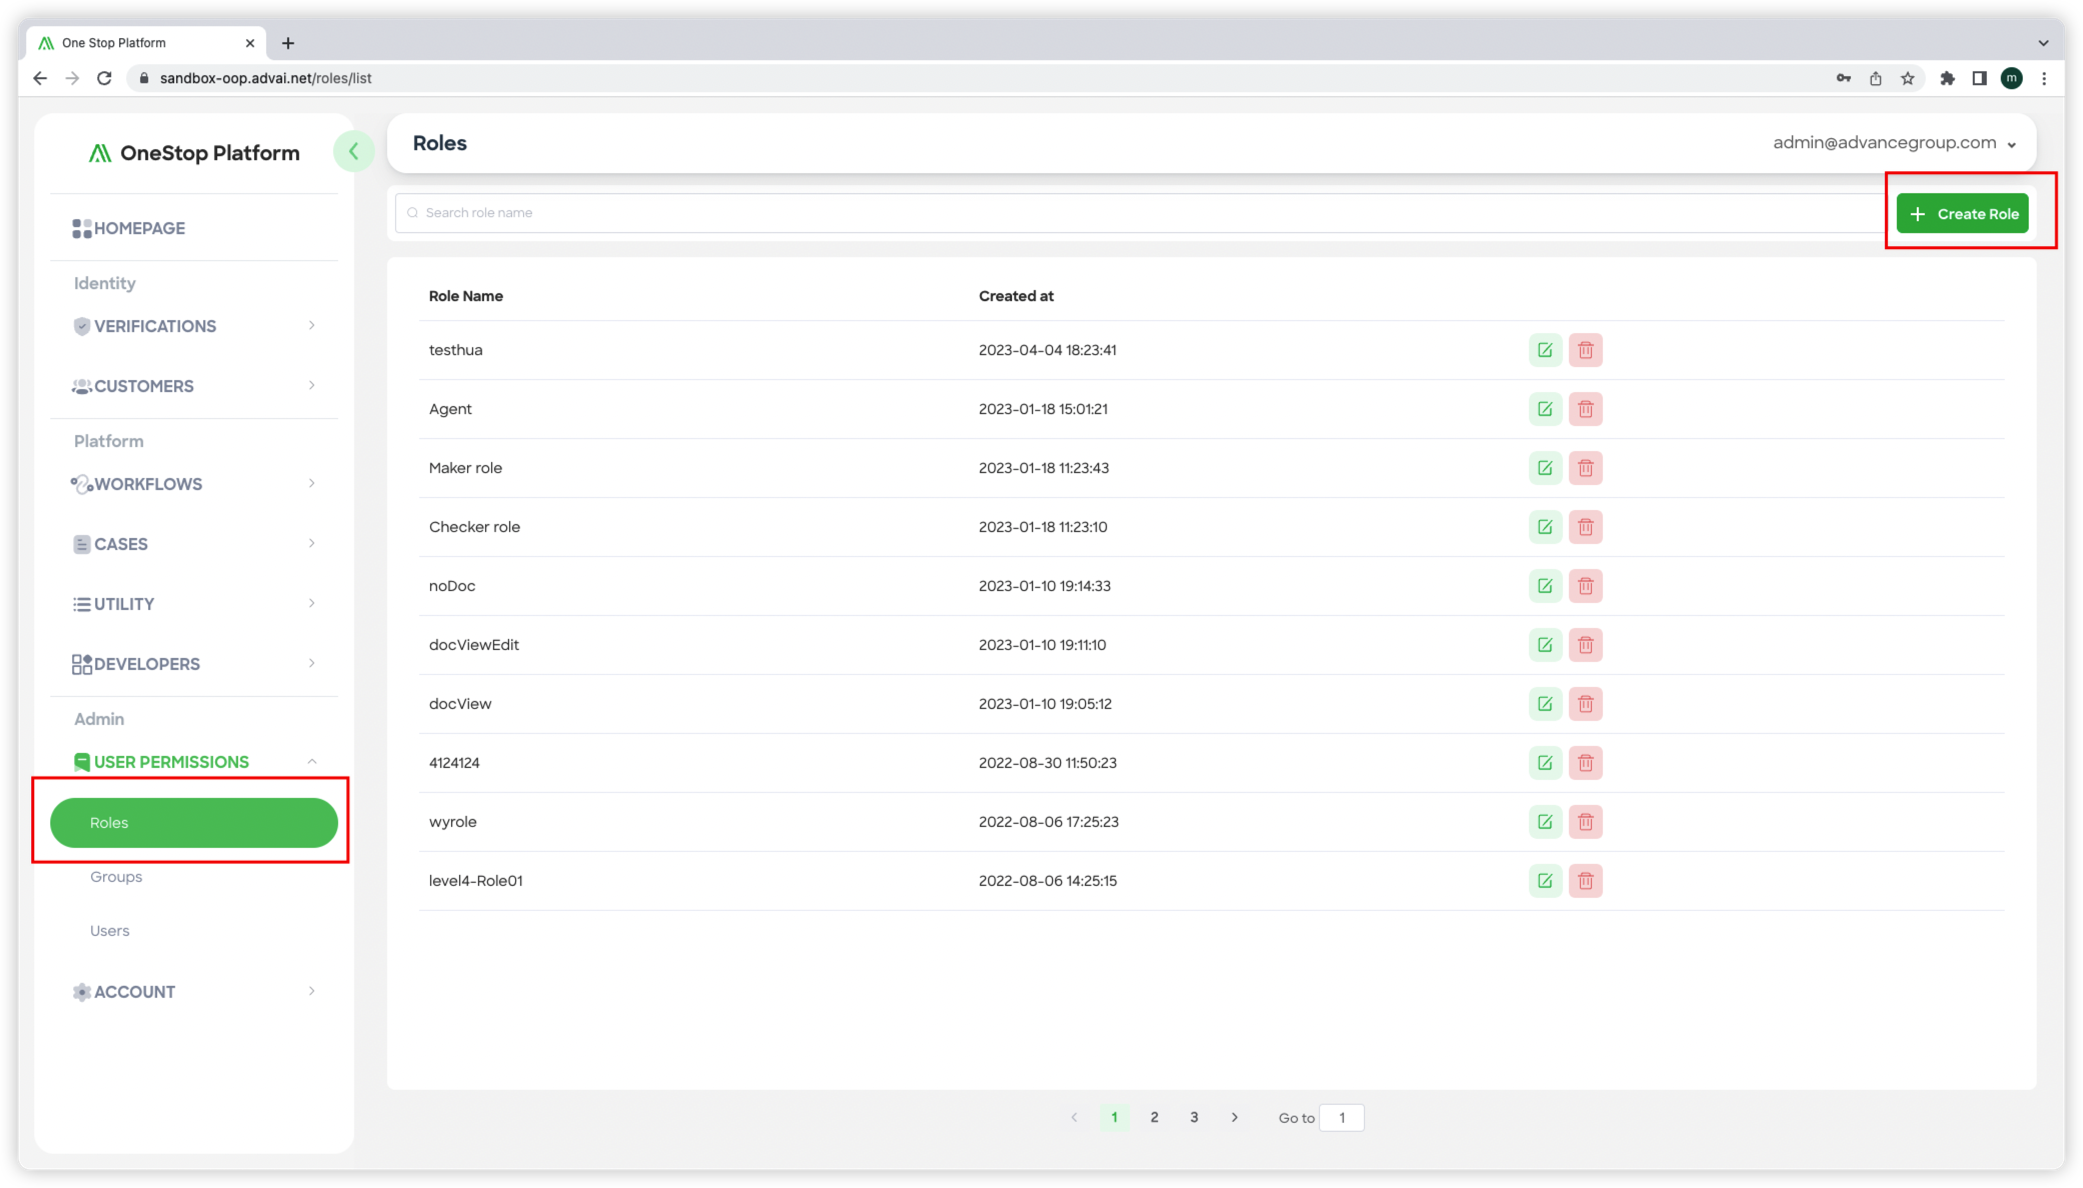
Figure 1 - Managing role
Step 1: Access the Roles Page
- Click the "Roles" button located in the left column of the One Stop interface.
- This will navigate you to the "Roles" page, which will be displayed as shown in "Figure 1 - Managing Role".
Step 2: Create a New Role
- On the "Roles" page, locate the "Create role" button positioned in the top right corner of the middle column.
- Click the "Create role" button to proceed with role creation.

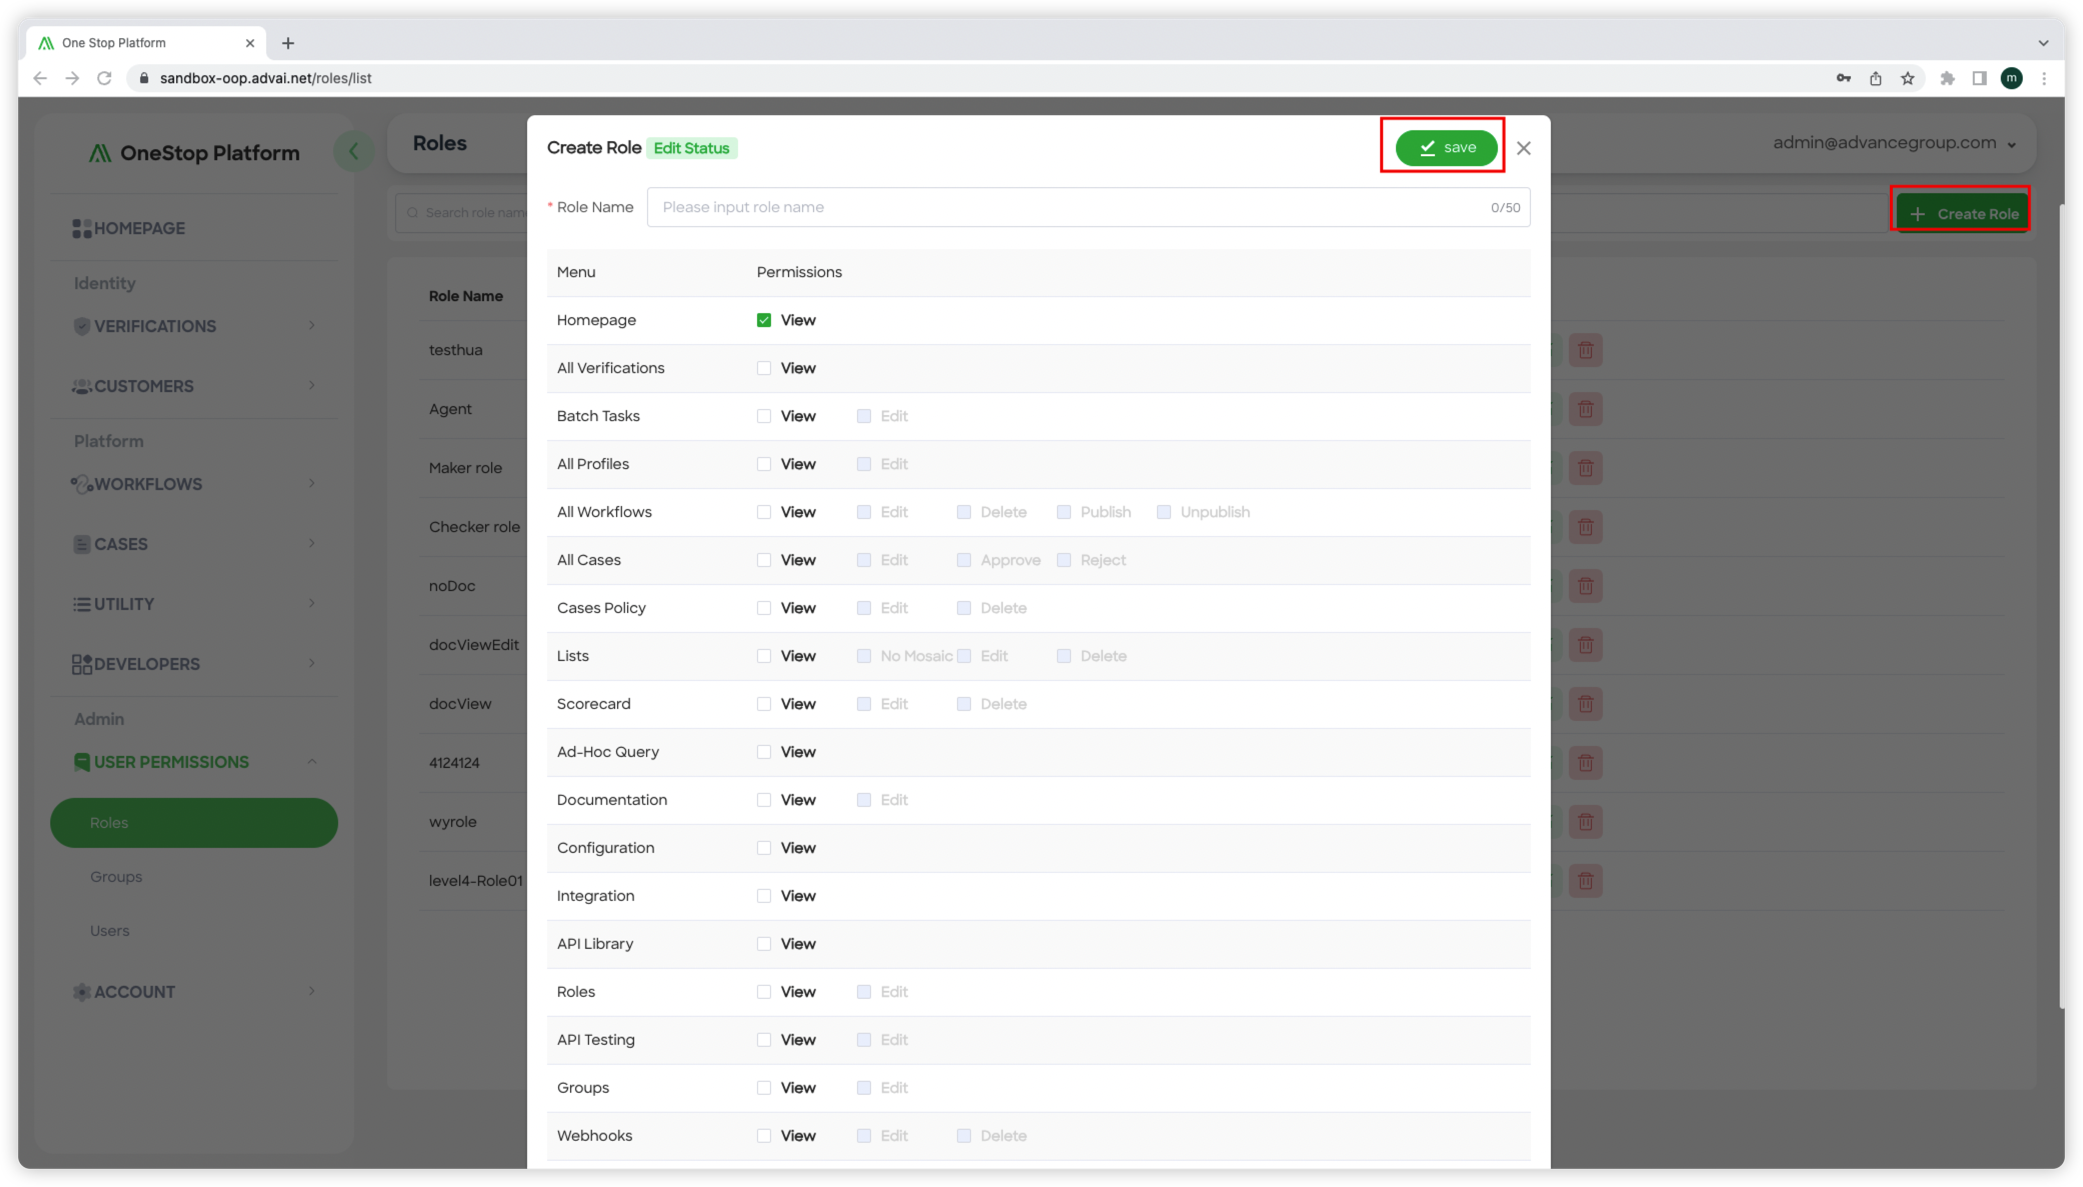
Figure 2 - Role permission detail
Step 3: Role Configuration
- In the role creation interface, enter a name for the role in the designated field.
- Assign operation permissions for the role by configuring the permissions column.
- The menu column represents the different functional modules available in the One Stop platform.
- The permissions column represents various operation permissions associated with each module.
- "View" permission allows users to view pages within the specified module.
- "Edit" permission enables users to edit content. For example, the "Edit" permission on the Cases page allows users to review cases.
- Other permissions such as "Check In," "Delete," "Publish," and "Unpublish" grant access to corresponding button functions on the page. For instance, the "Check In" permission on the Cases page allows users to click the "Check In" button to mark cases as checked in.
Step 4: Save the Permission Settings
- Once you have configured the desired permissions for the role, click the "Save" button to upload and save the permission settings.
By following these steps, you can create new roles, define their permissions, and save the role configuration within One Stop.
Updated 3 months ago
