4.Create Users
Here is a step-by-step guide on creating a new user within One Stop:

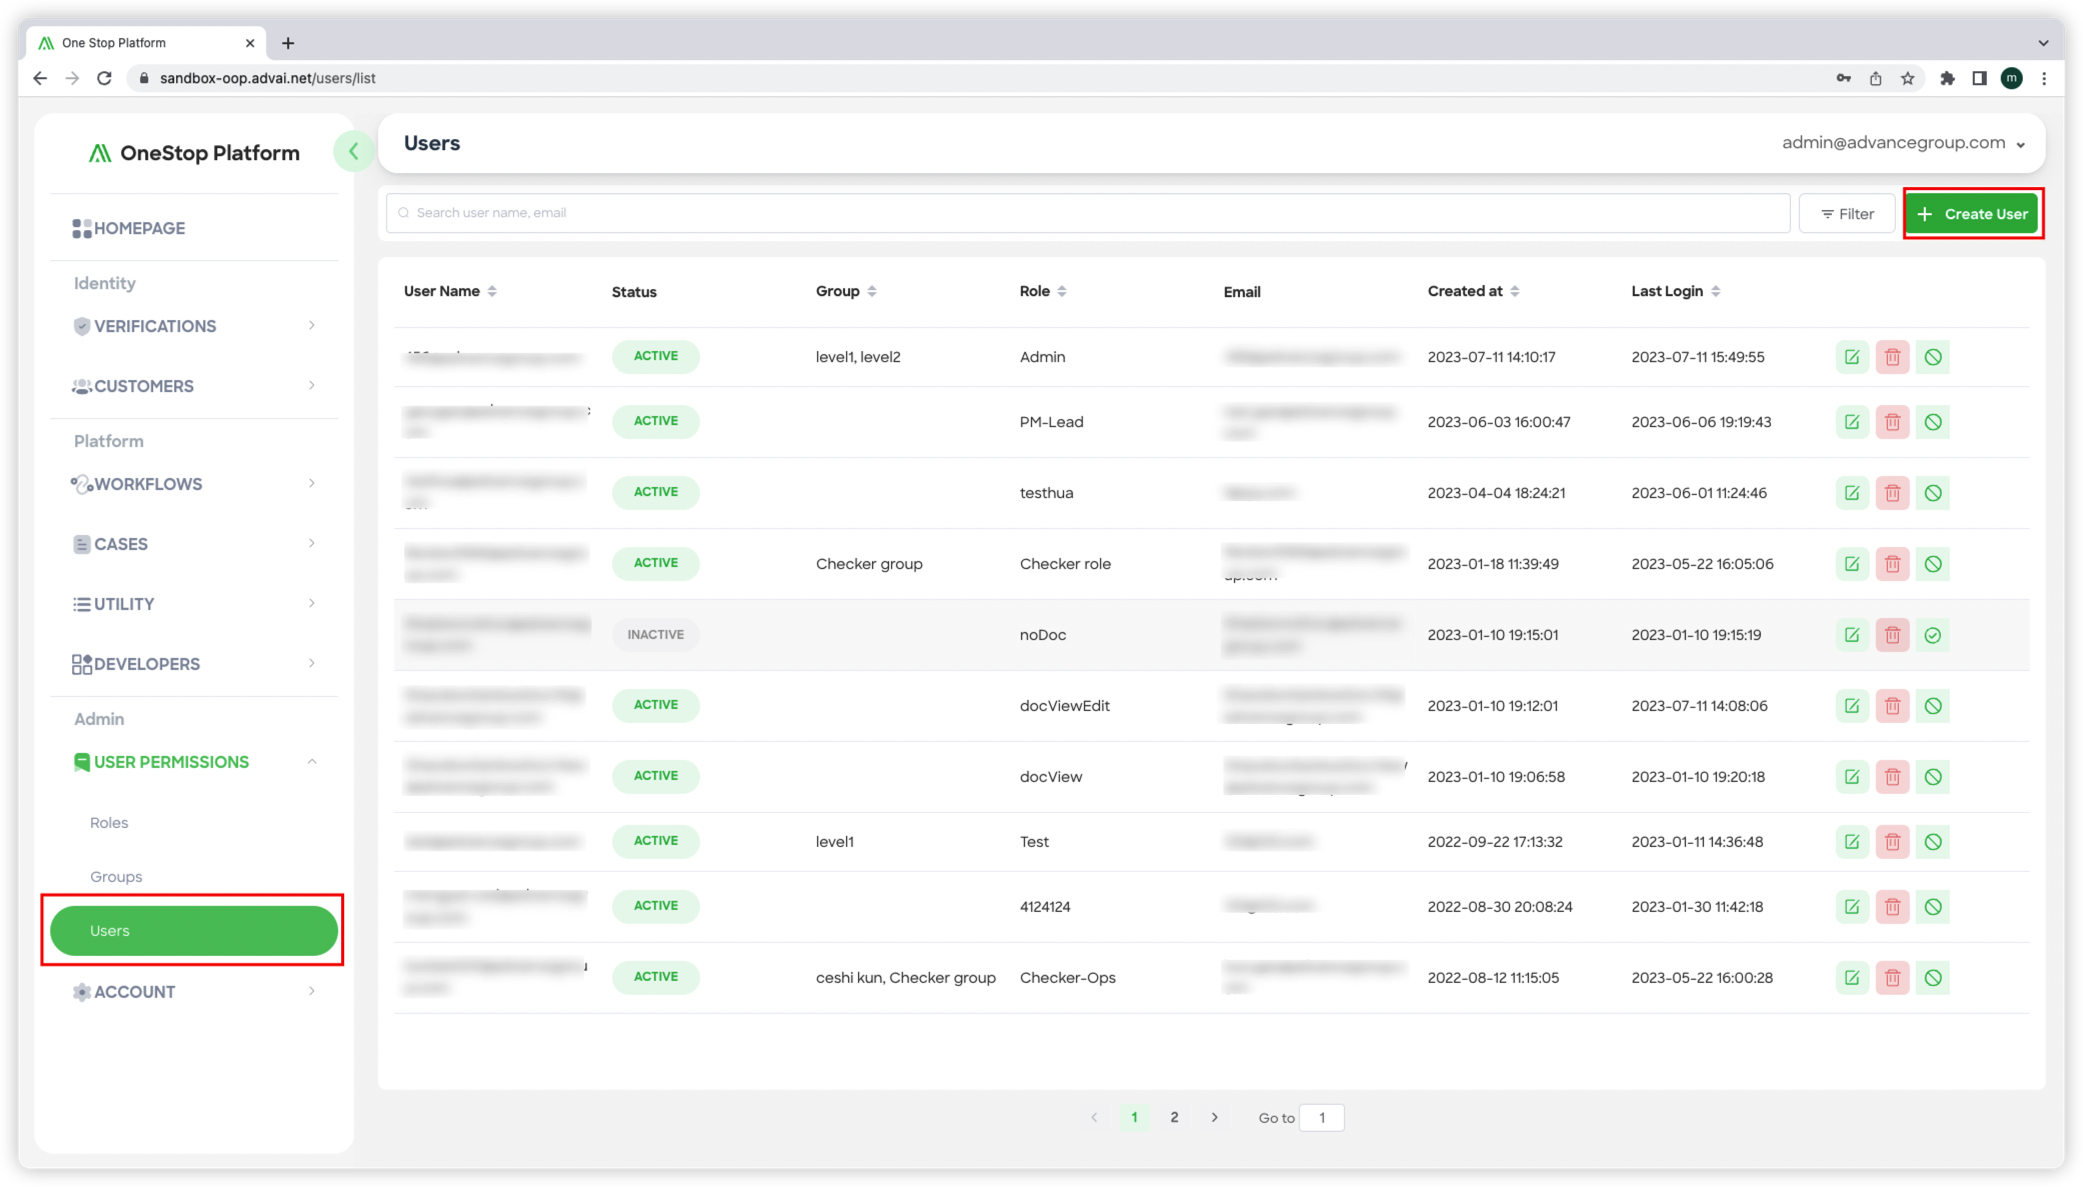
Figure 1 - User Page
Step 1: Access the Users Page
- Click the "Users" button located in the left column of the One Stop interface.
This will navigate you to the "Users" page, which will be displayed as shown in "Figure 1 - User Page".

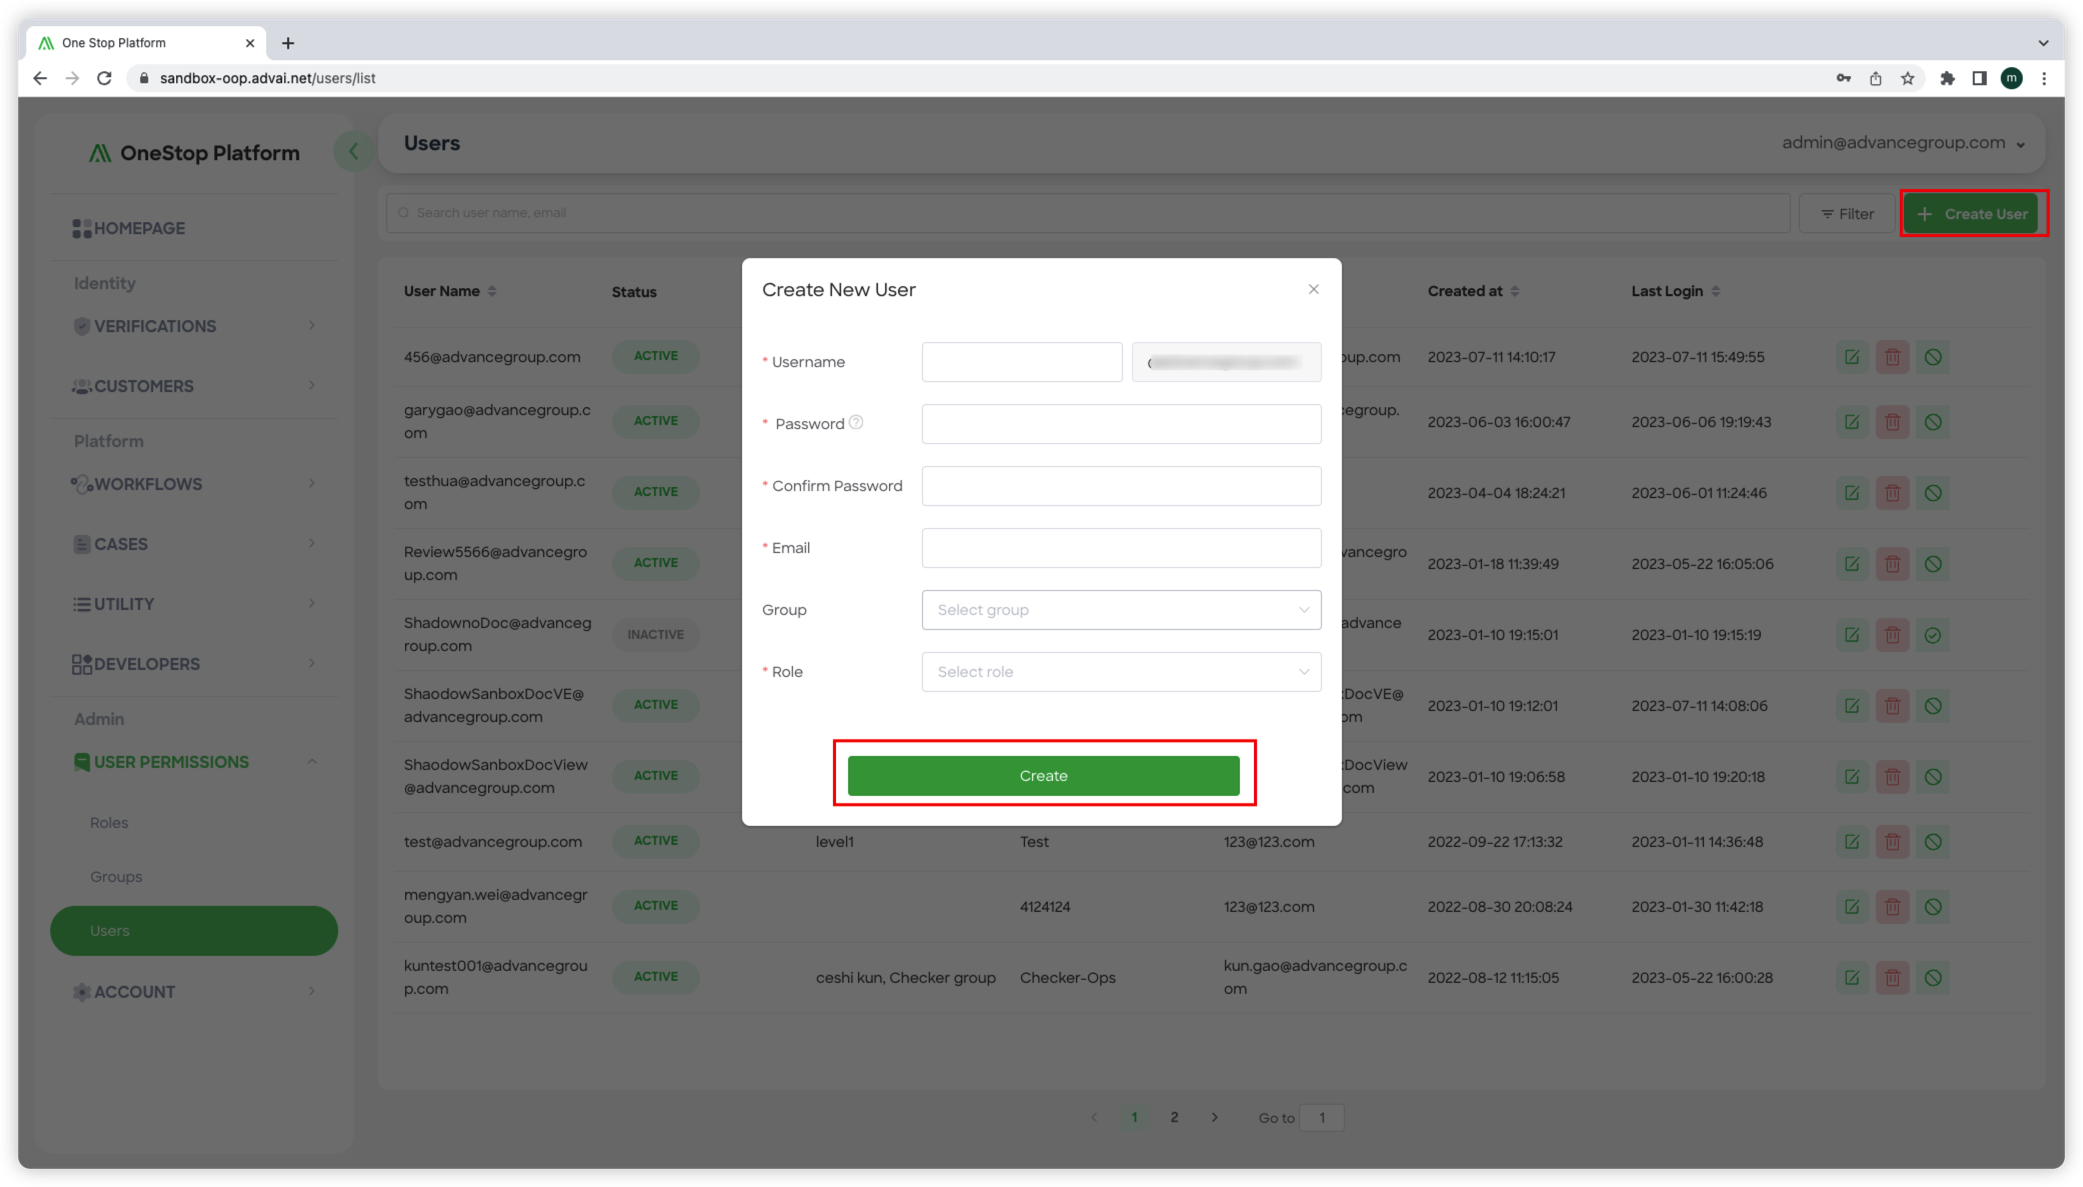
Figure 2 - Create New User Details
Step 2: Create a New User
- On the "Users" page, locate the "Create user" button and click on it.
- This will open the "Create New User" page, where you can input the user details.
- The "Create New User" page will be displayed as shown in "Figure 10 - Create New User Details".
Step 3: Enter User Information
- In the "Create New User" page, enter the required user information, such as name, email, and any other relevant details.
- Select the team and role for the user from the available options.
- Please ensure that the password you set for the user adheres to the specified rules:
- Must include at least one lowercase character.
- Must include at least one uppercase character.
- Must include at least one digit.
- Must include at least one special character (e.g., !$#%).
- Must be at least 8 characters in length.
Step 4: Create the User
After entering the user information and setting a secure password, click the "Create" button to create the user.
The new user will be successfully created and added to the list of users in One Stop.
By following these steps, you can create a new user in One Stop, assign groups and role, and set a password that meets the specified requirements. This enables you to manage user accounts and access permissions within the platform effectively.
Updated 3 months ago
