Assgin Cases
Assgin a case from the case tab page

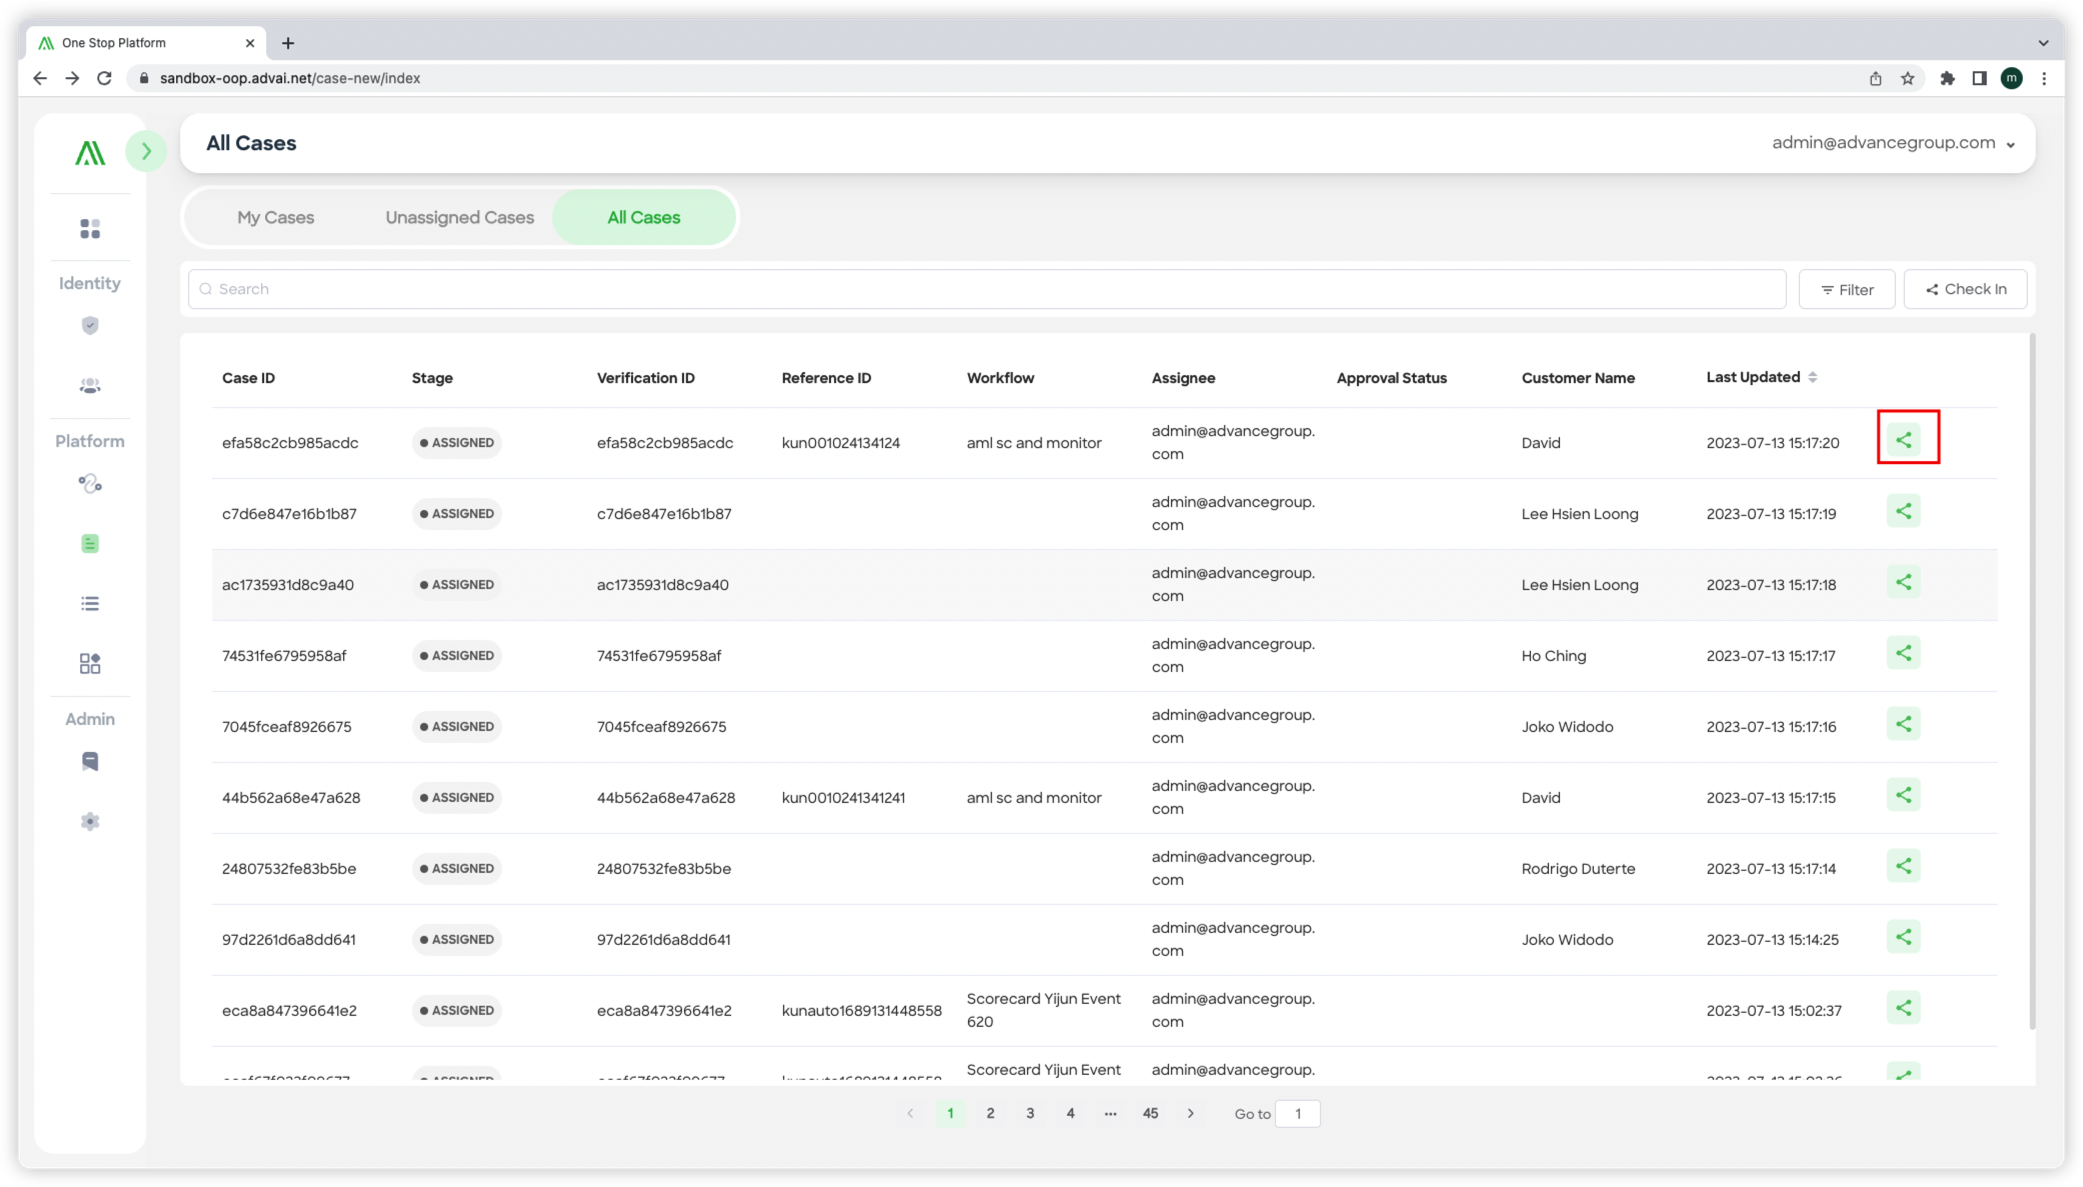
Figure 1 - Assign on the 'All Cases' List
Step 1: Assigning a Case
To assign a case to another reviewer or take specific actions related to case assignment within One Stop, follow these steps:
- On the "All cases" list within the "Cases" page, locate the case you want to assign and click the "Assign" button. This action will open a pop-up window for case assignment. Refer to "Figure 1 - Assign on the 'All Cases' List" for visual guidance.

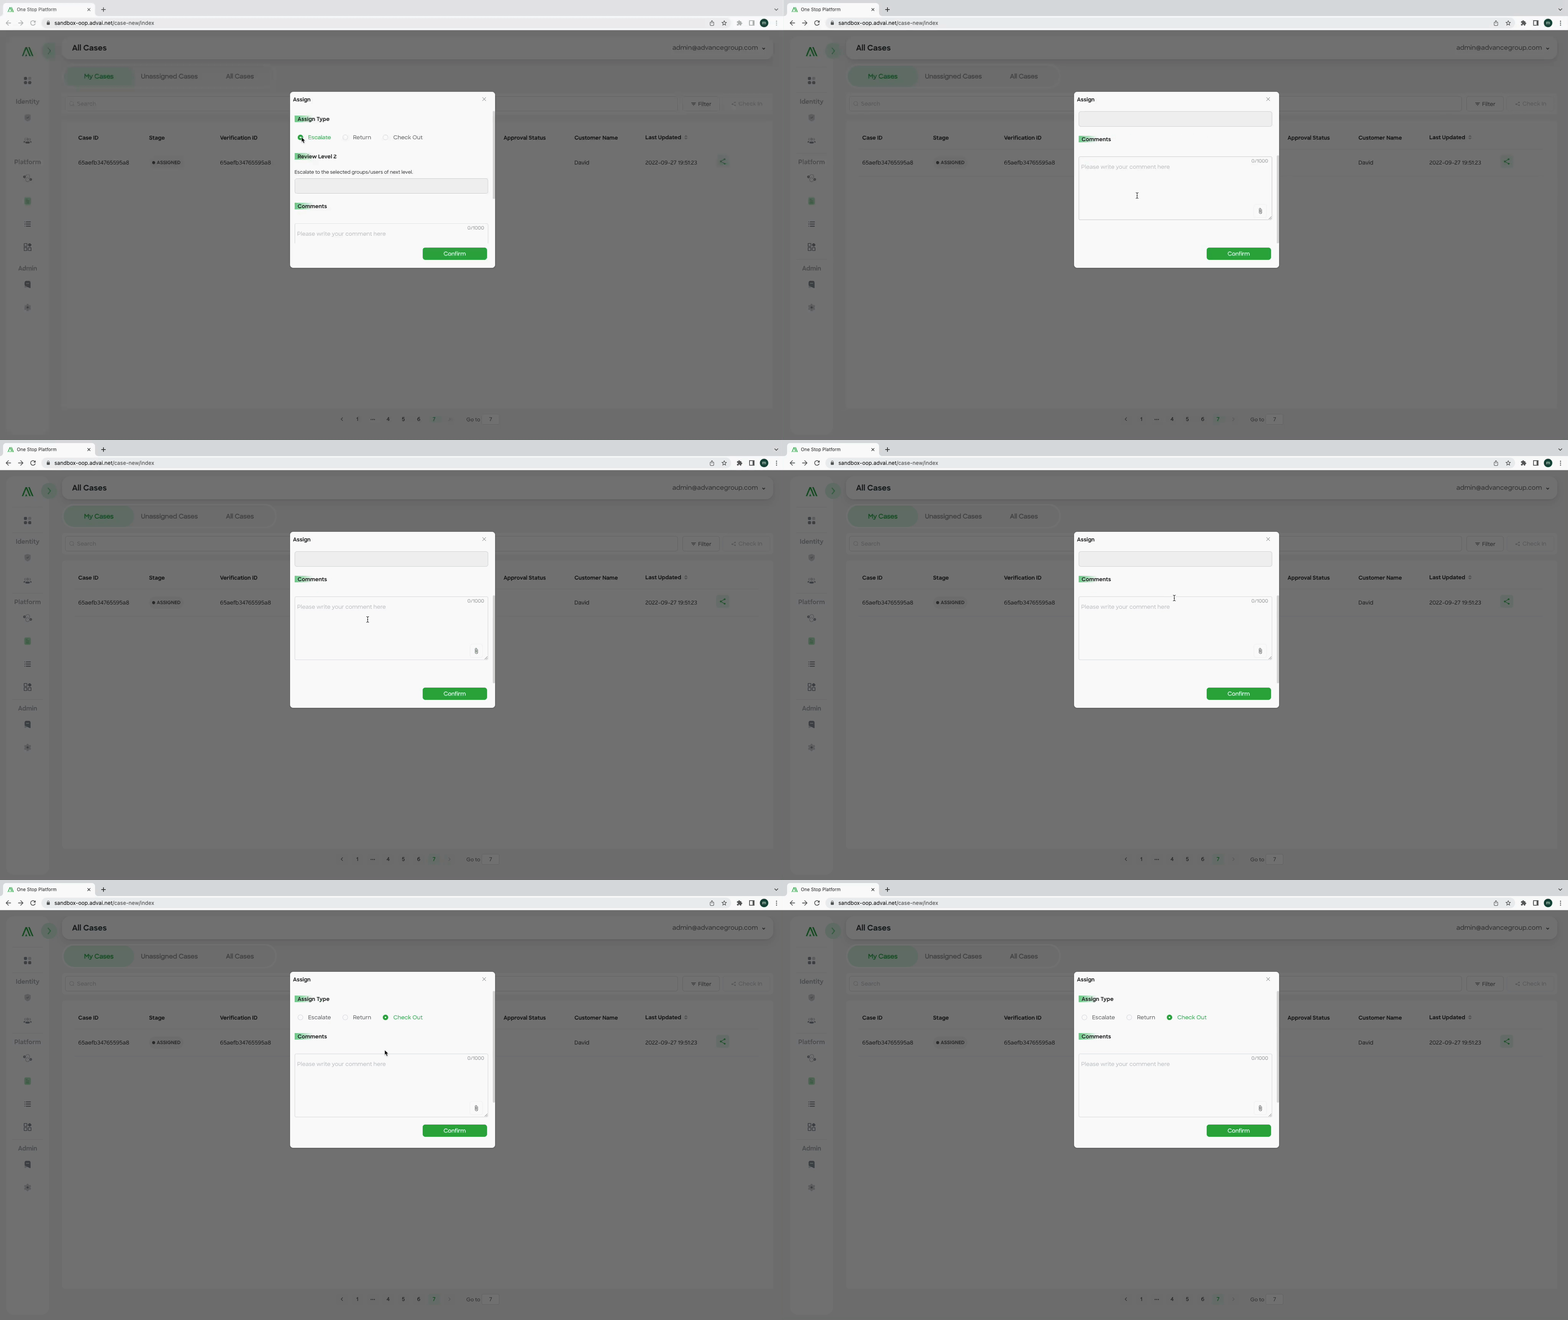
Figure 2 - pop-up window for case assignment
Step 2: Selecting the Assignment Type
- In the pop-up window, you will find the "Assign Type" field. Choose one of the three available assignment types, as illustrated in "Figure 2 - pop-up window for case assignment":
- Escalate: Selecting this option will escalate the case to a higher review level.
- Return: Choosing this option will return the case to the previous reviewer.
- Check out: Selecting "Check out" will change the case to an unassigned stage.
Step 3: Review Level Selection ( only for escalate and return types)
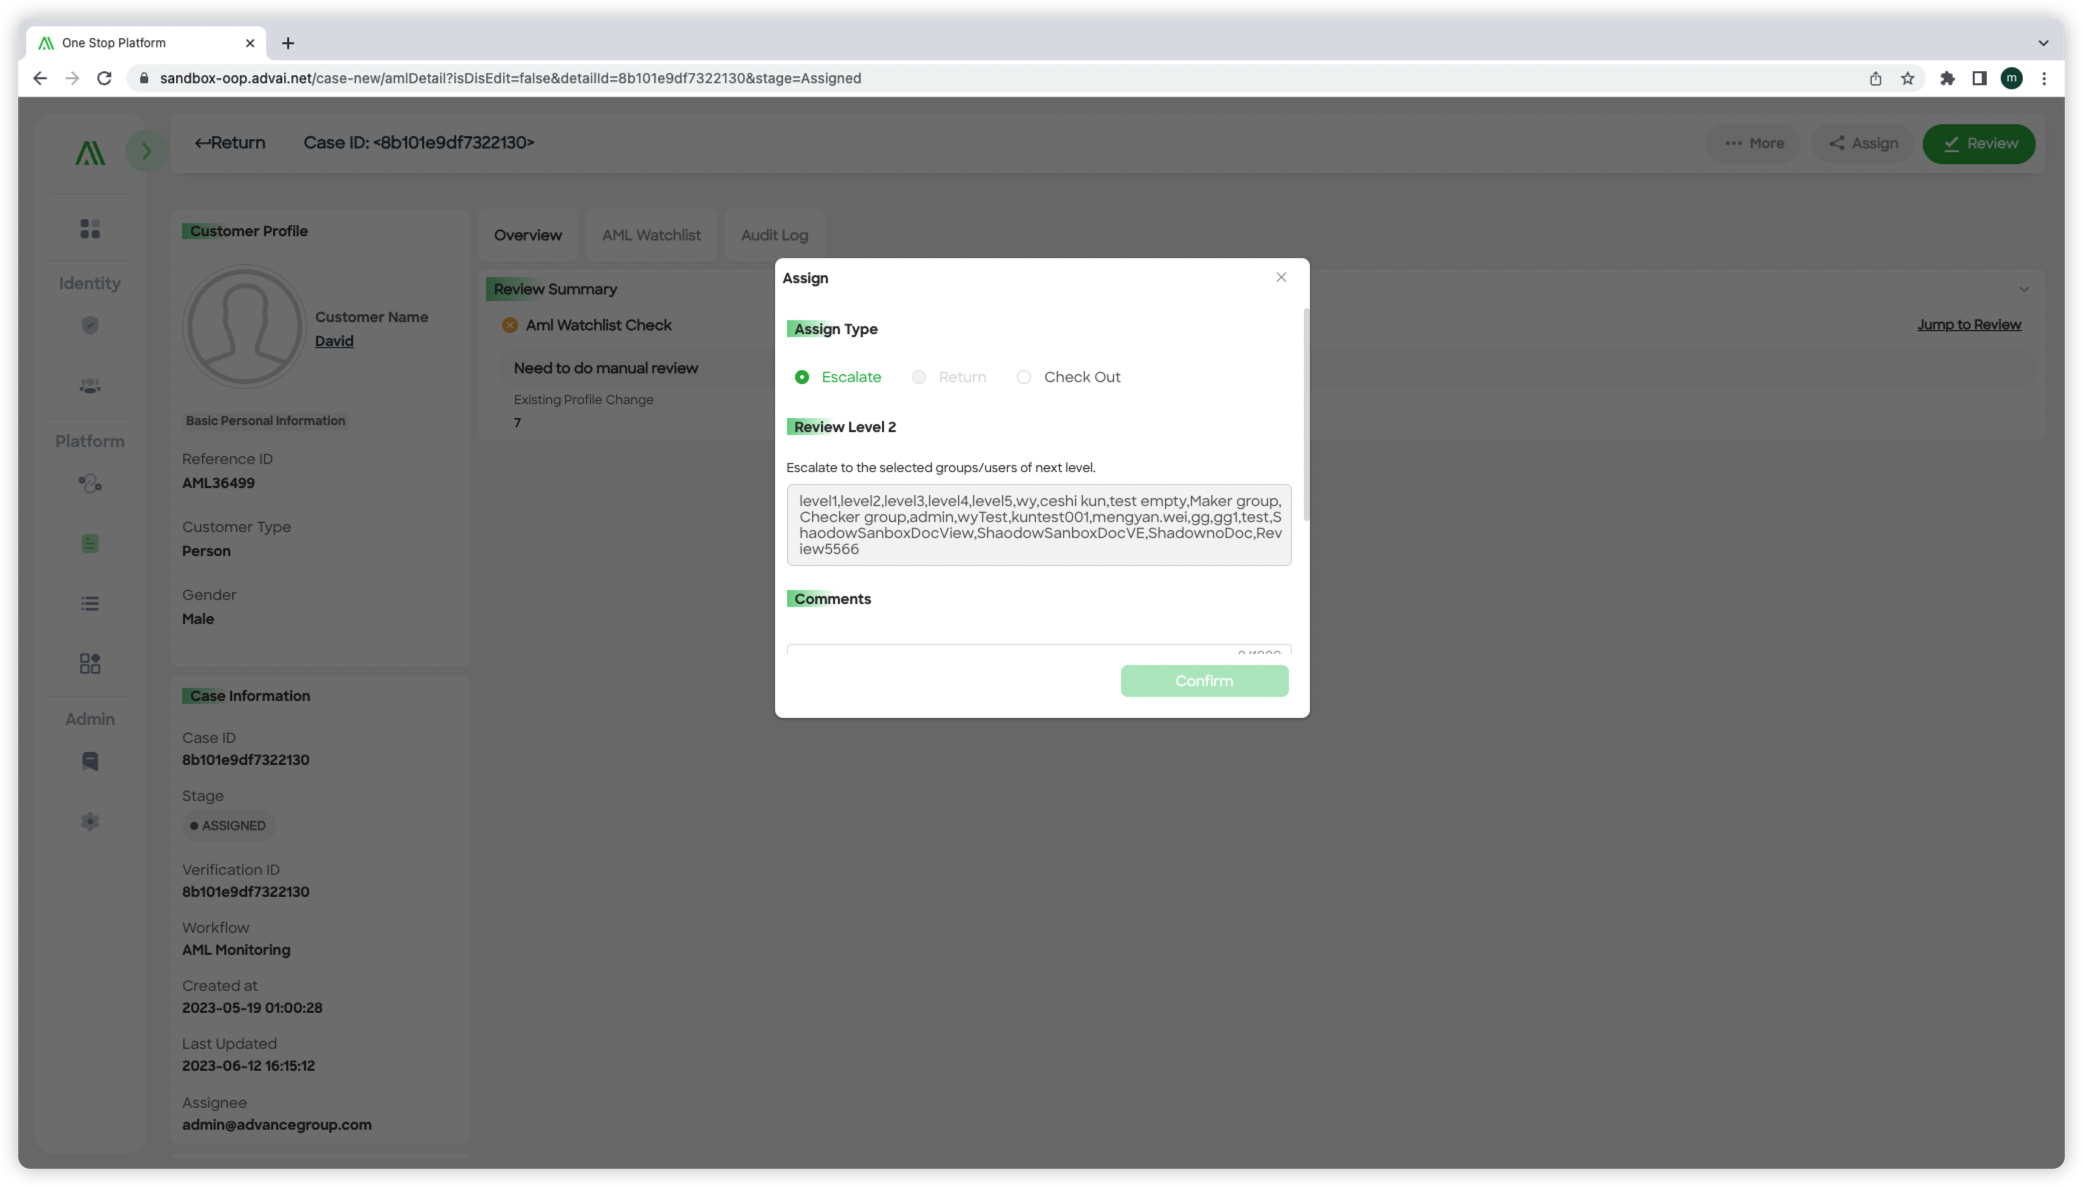
- The pop-up window also displays the review level, indicating the group configured in the case review policies.
Step 4: Entering Review Comments
- Enter any necessary review comments in the designated field. These comments can provide additional context or instructions related to the case. You can also upload attachments if required.
Step 5: Confirming and Saving Information
- After reviewing the assigned details, click the "Confirm" button to save the assignment information and proceed with the assigned action.
By following these steps, you can effectively assign cases, escalate them to higher review levels, return them to previous reviewers, or change their status to an unassigned stage. The case assignment functionality in One Stop allows for efficient collaboration and ensures cases are appropriately managed throughout the review process.
Assgin a case from the case detail

Updated 2 months ago
