Check in Cases

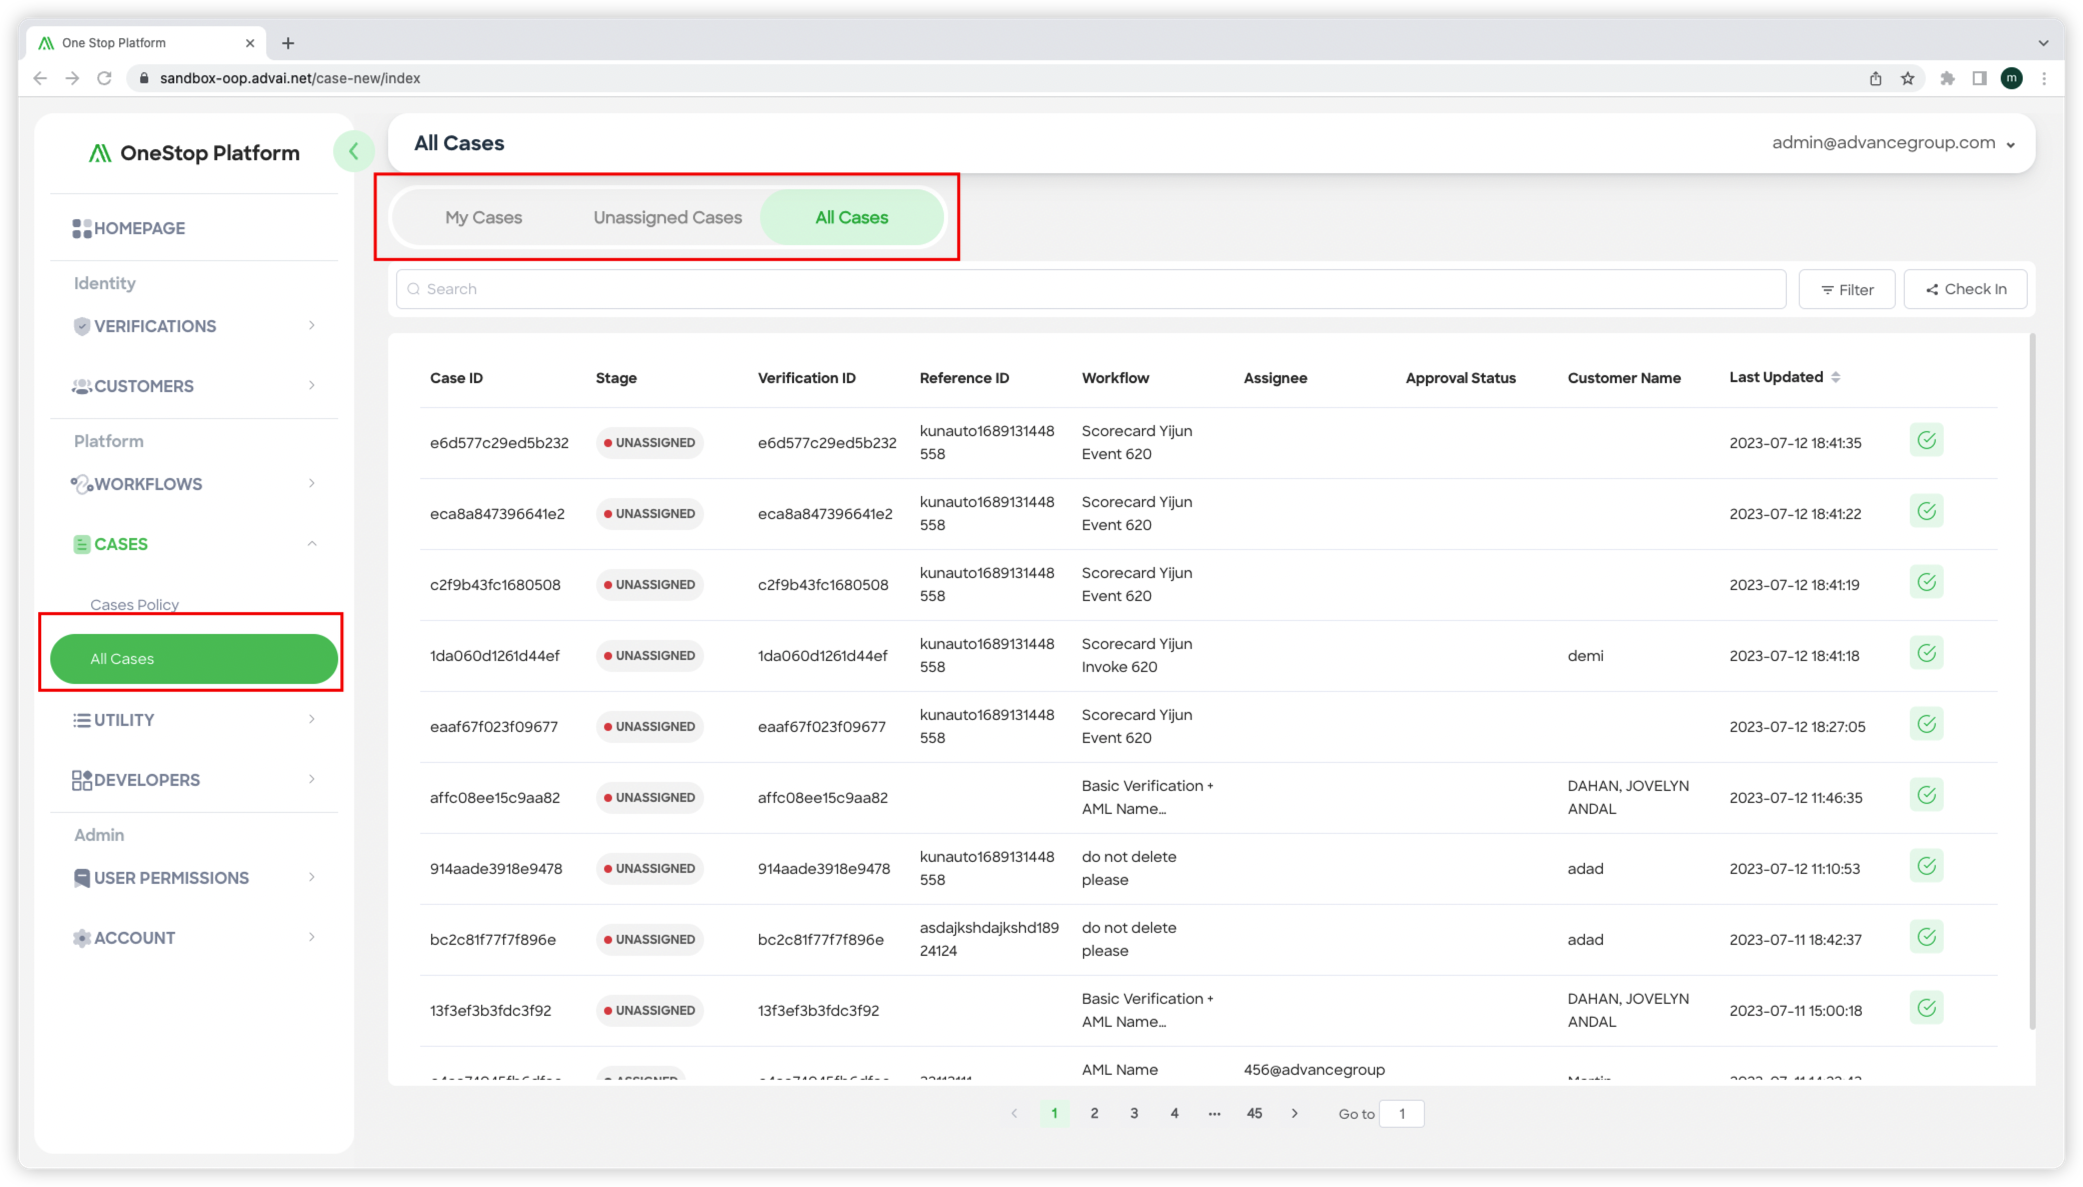
Figure 1 -All case list
Step 1: Accessing the Cases list Page
To navigate to the cases list page and manage your cases within One Stop, follow these steps:
- Click the "Cases" button located in the left column of the One Stop interface.
- This will direct you to the cases section, which includes three tab pages: "My cases," "Unassigned cases," and "All cases."
- "My cases" Tab:
- This tab displays cases that you have personally checked in for review.
- It provides a list of cases assigned to you, allowing you to conveniently access and manage your assigned workload.
- "Unassigned cases" Tab:
- The "Unassigned cases" tab presents cases that have not yet been checked in for review.
- These cases are waiting to be assigned to a reviewer.
- It enables administrators or supervisors to assign cases to specific individuals or groups for review.
- "All cases" Tab:
- The "All cases" tab provides an overview of all cases generated by workflows.
- It displays a comprehensive list of cases, including those that have been assigned, checked in, or completed.
- This tab allows users to monitor and track the progress of all cases within the One Stop platform.
- "My cases" Tab:
- Each tab page represents a different set of cases and provides a similar structure for managing and reviewing cases.
- For the purpose of this explanation, we will focus on the "All cases" tab as an example. Refer to "Figure 1 - All case list" to get an overview of the cases display.
Step 2: Accessing the "All Cases" Page
- Click the "All cases" tab to access the "All cases" page.
- This page presents a list of cases generated by workflows and provides various attributes for each case.
- Attributes of a Case:
- Case ID: A unique string of characters automatically generated by the One Stop platform to identify each case.
- Stage: Indicates the review stage of the case and can be categorized as "UNASSIGNED" (if the case is not checked in), "ASSIGNED" (if the case has been checked in), or "COMPLETED" (if the review process has been completed).
- Verification ID: The verification ID associated with the case.
- Assignee: The reviewer who has checked in the case for review.
- Approval Status: The result of the review process, denoted as "APPROVED" or "REJECTED"
- Customer Name: The name of the customer associated with the case.
- Last Update: The timestamp indicating the last update of the case.
Step 3: Checking In Cases

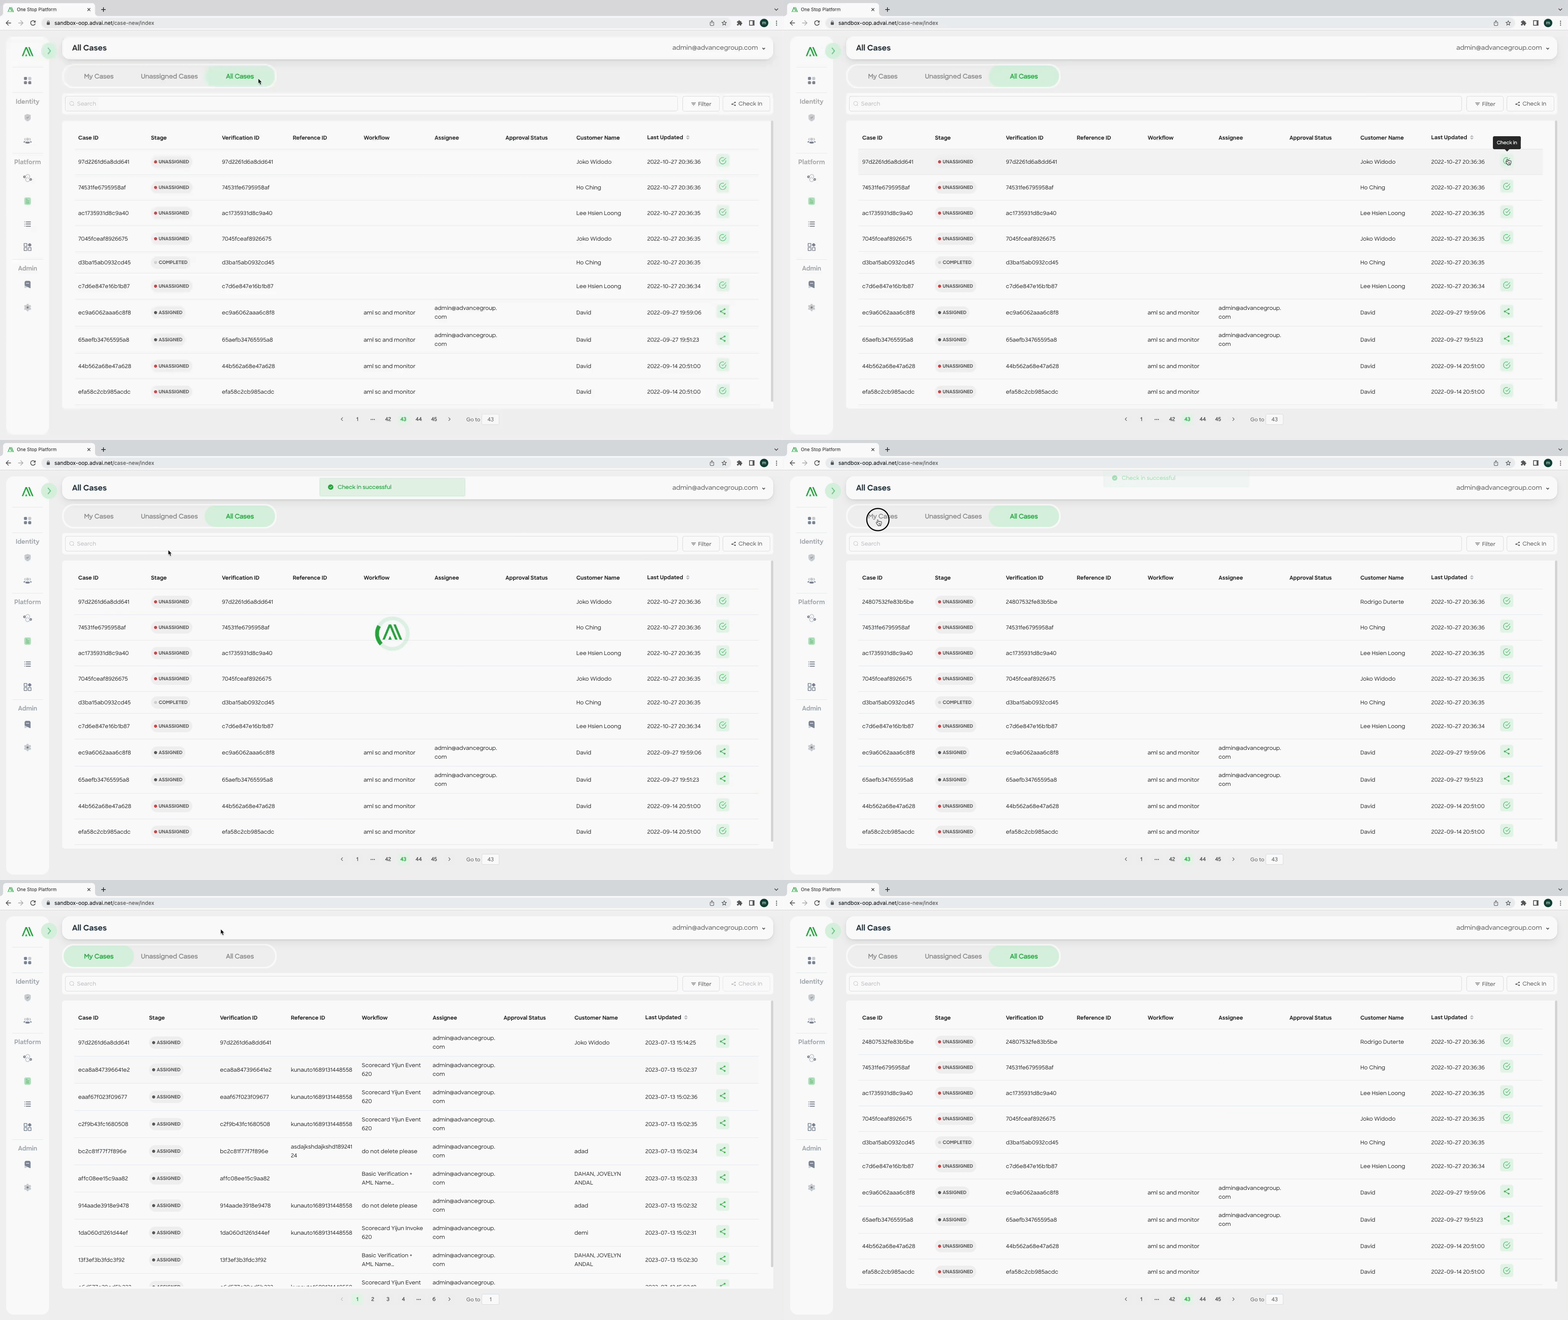
Figure 2 - Check In on the 'All Cases' List

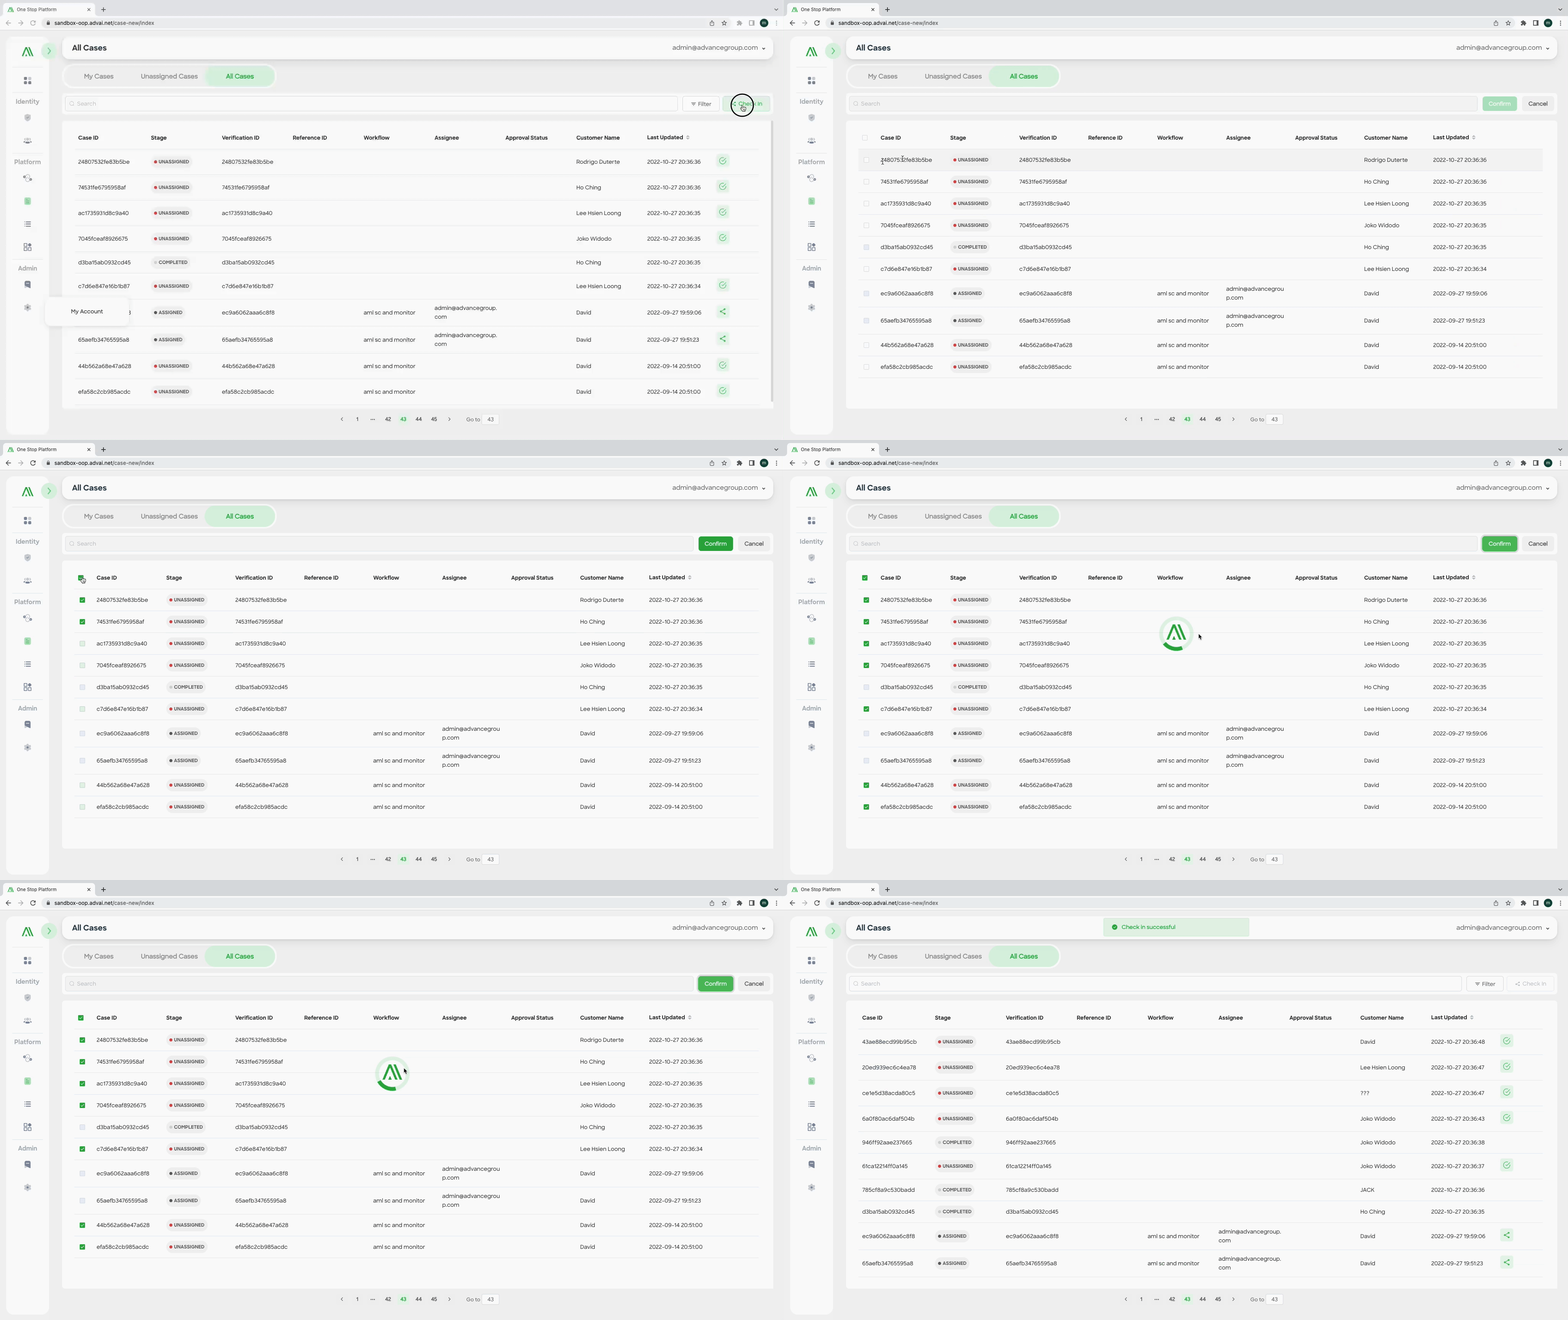
Figure 3 - Bulk check In on the 'All Cases' List
- To check in a case and assign it to yourself for review, click the "Check in" sign located in the operation column on the "All cases" page or the "Unassigned cases" list. This action changes the case's reviewer to the user who performs the check-in.
- Alternatively, you can use the "Check in" button next to the search box for bulk operations. Select the desired cases and change the case reviewer to yourself. Refer to "Figure 2 - Check In on the 'All Cases' List" and "Figure 3- Bulk Check In on the 'All Cases' List" for visual representation".
- After successfully checking in cases for review, the cases you have checked in will be displayed on the "My cases" tab within the "Cases" page.
Step 4: Reviewing Checked-in Cases
- After successfully checking in cases, you can review these cases on the case detail page.
Updated 3 months ago
