3. Create Groups
Here is a step-by-step guide on managing groups within One Stop:

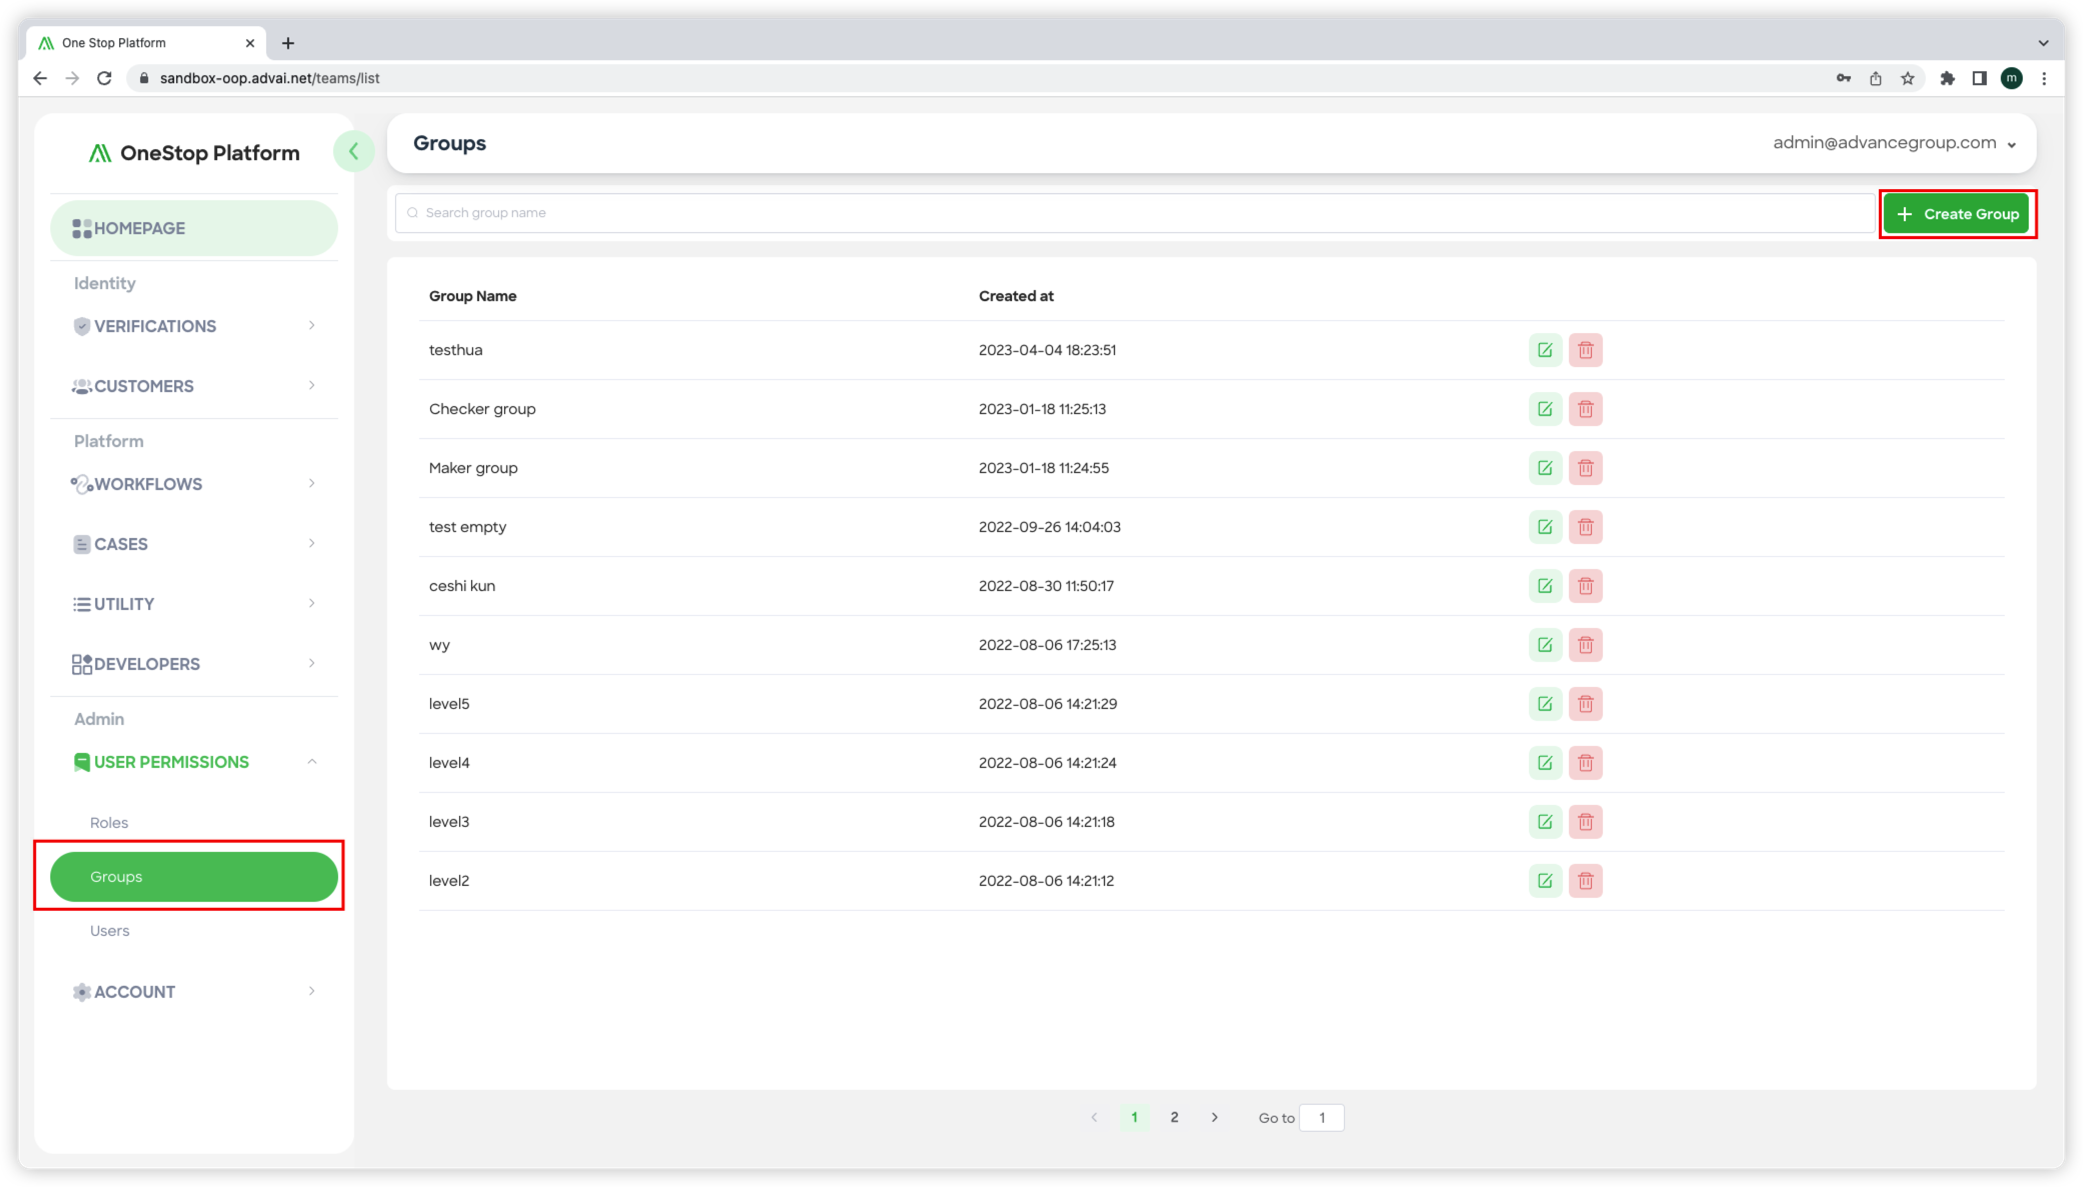
Figure 1 - Managing Groups
Step 1: Access the Groups Page
- Click the "Groups" button located in the left column of the One Stop interface.
- This will navigate you to the "Groups" page, which will be displayed as shown in "Figure 1 - Managing Groups".
Step 2: Create a New Group
- On the "Groups" page, locate the "Create group" button positioned in the top right corner of the middle column.
- Click the "Create group" button to initiate the group creation process.

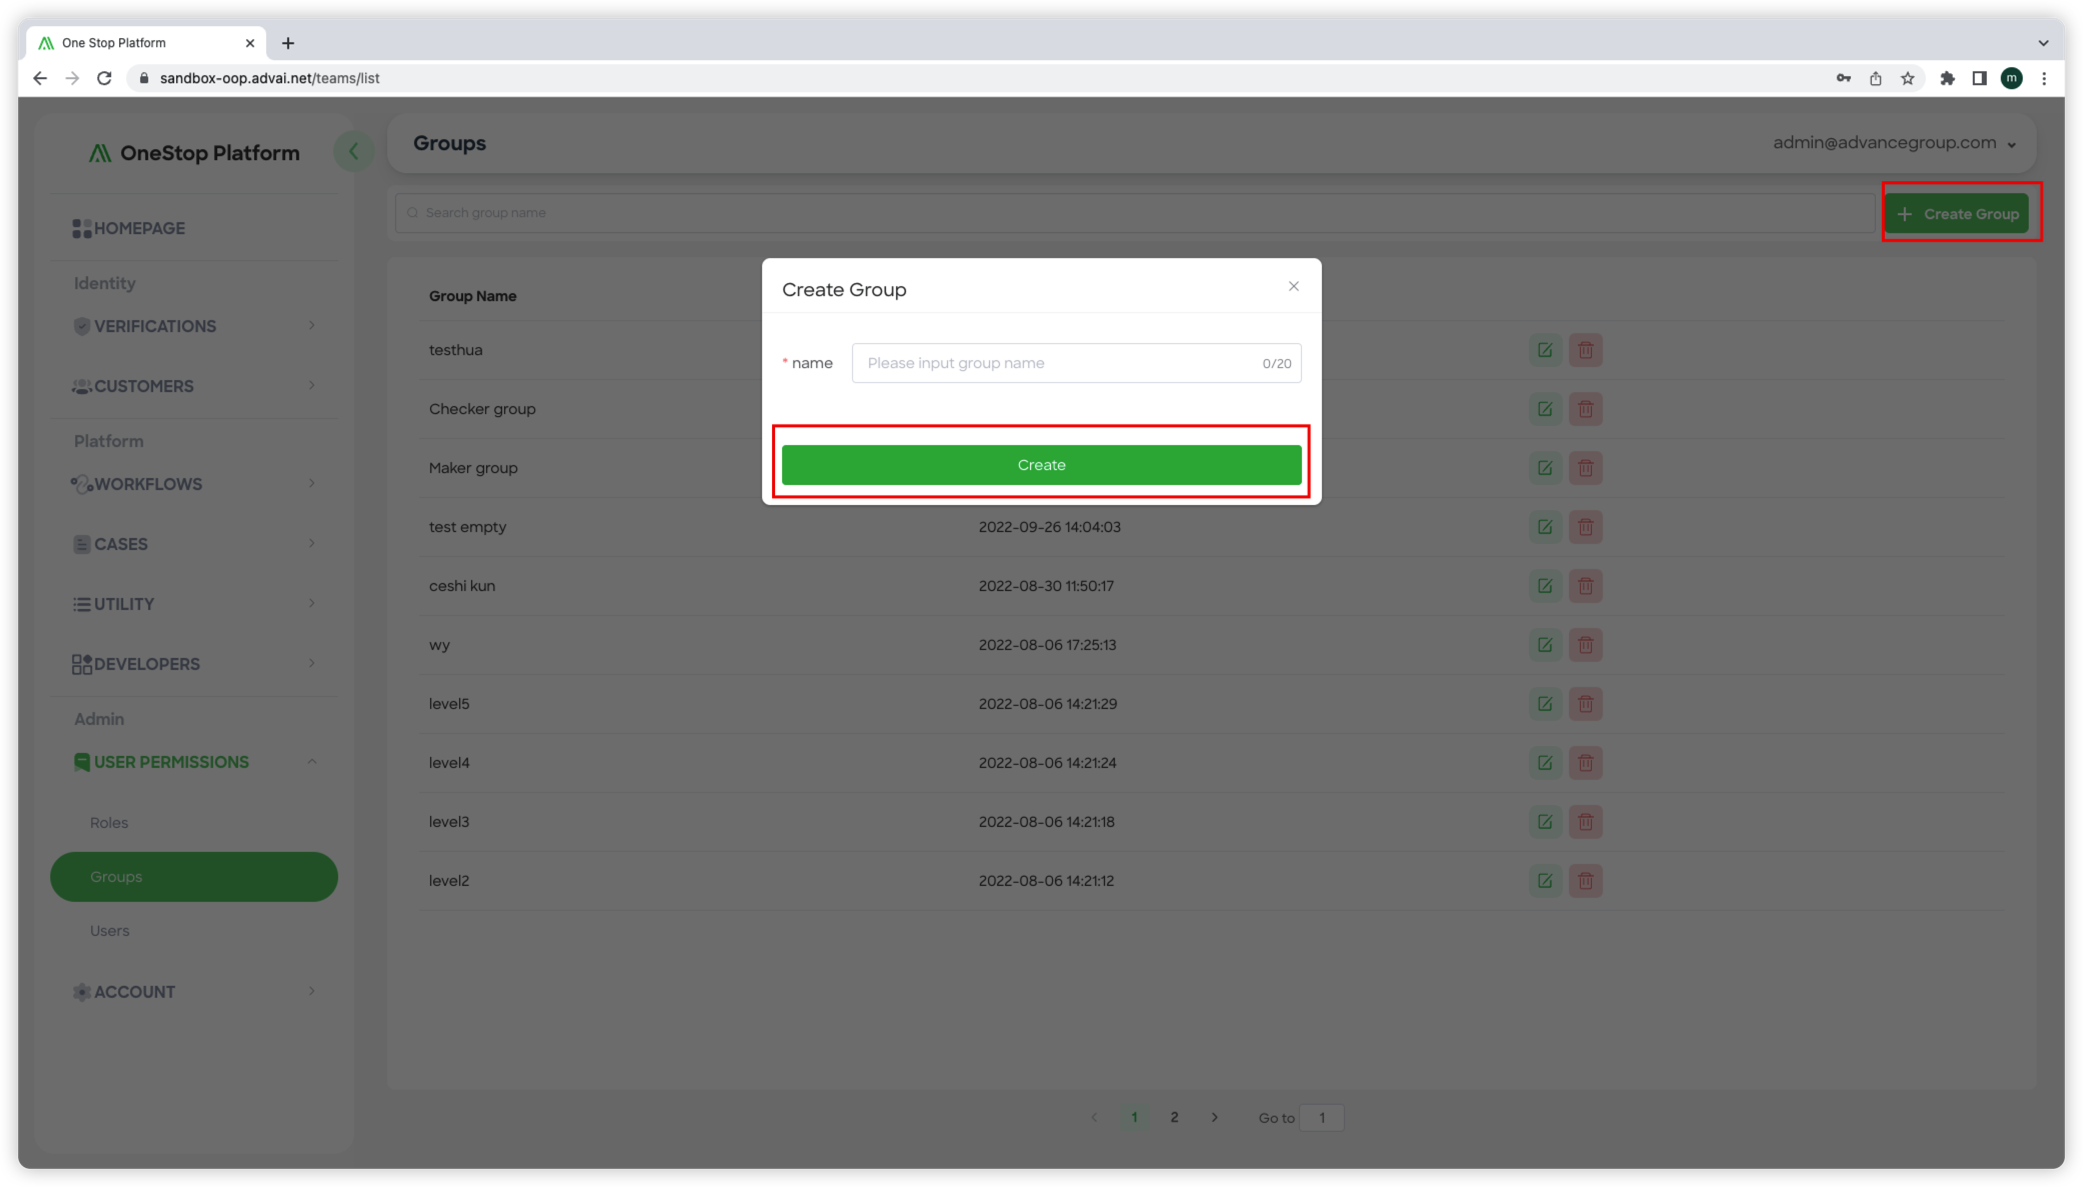
Figure 2 - The Pop-up Window for Adding a New Group
Step 3: Add Group Details
- Upon clicking the "Create group" button, a pop-up window titled "Add New Group" will appear.
- In the pop-up window, enter a name for the group in the designated field.
- Please note that the group name should not exceed 20 characters.
- The pop-up window for adding a new group will be displayed as shown in "Figure 2 - The Pop-up Window for Adding a New Group".
Step 4: Create the Group
- After entering the group name, click the "Create" button to create the group.
- The group will be successfully created and added to the list of groups on the "Groups" page.
By following these steps, you can create new groups within One Stop, enabling you to assign cases and provide access to a specific set of users or teams.
Updated 3 months ago
