Workflow nodes
Here is a breakdown of the different types of nodes available within One Stop workflows:
Interface Nodes
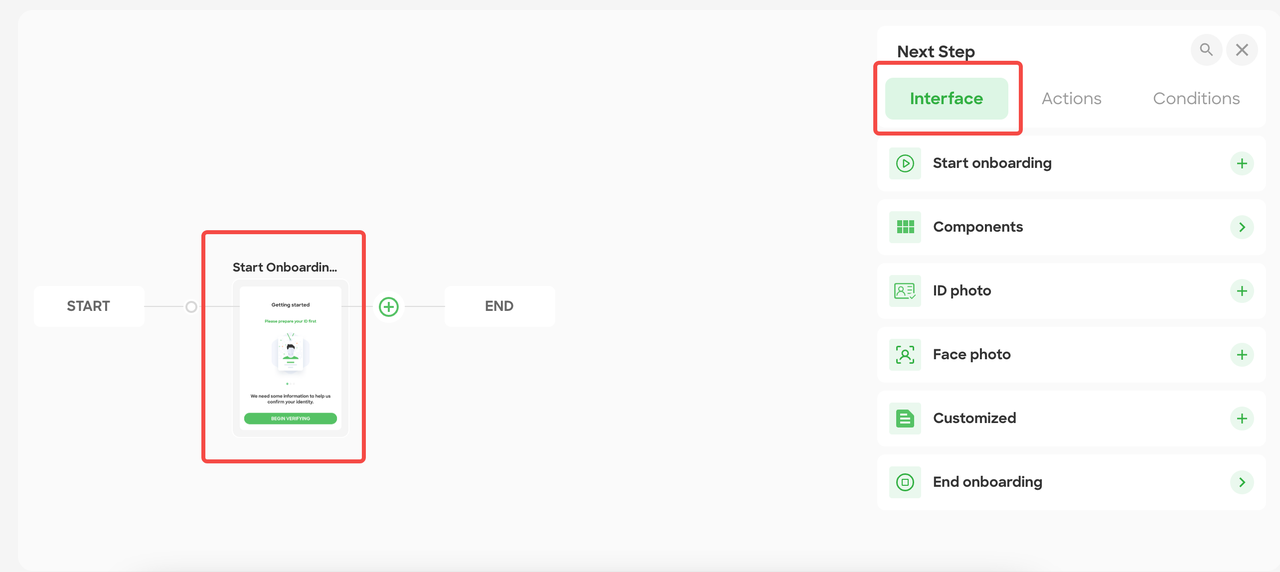
Figure 1 - Interface Node Menu
The "Interface" node allows you to configure user interaction pages for the verification process. It offers a list of categories, each containing a set of service nodes. When selected, configuration options will appear in the right-side menu, and the interface nodes added will be displayed as thumbnails on the canvas. Refer to "Figure 15 - Interface Node Menu" for visual reference.
Start Onboarding
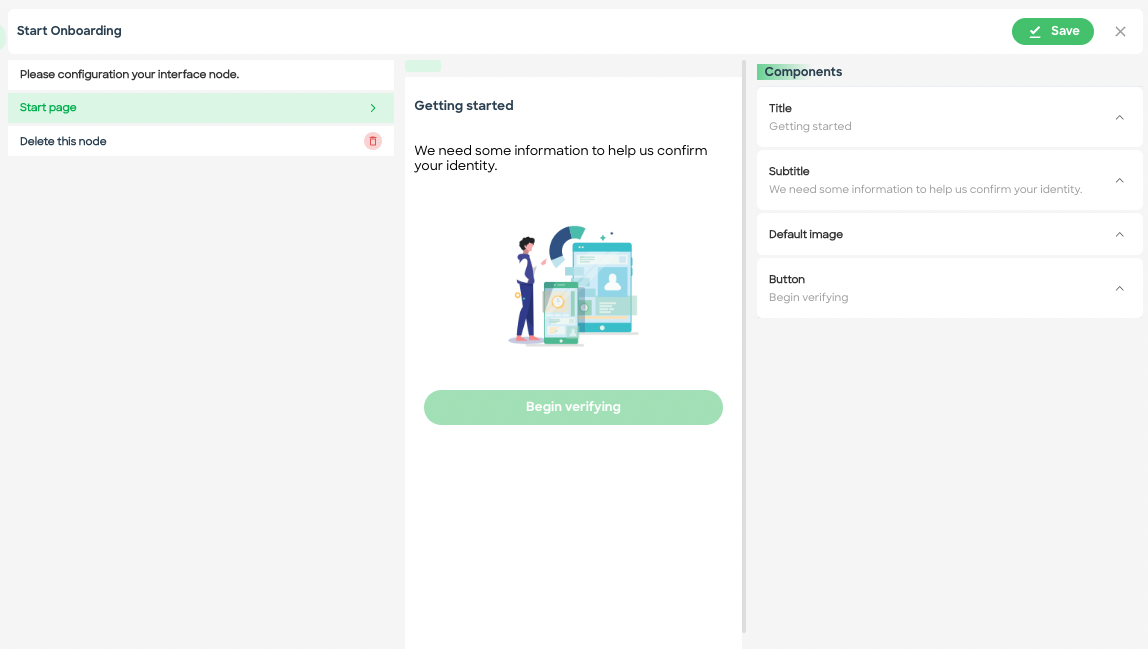
- The "Start Onboarding" node enables users to configure components such as Title, Subtitle, Image, and Button for the onboarding process.
Components:
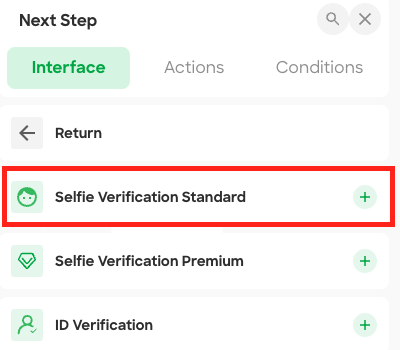
Figure 3 -Components menu
- Components include Biometric Authentication and ID Verification services, which are aggregations of interface nodes and data nodes.
Selfie Verification Standard
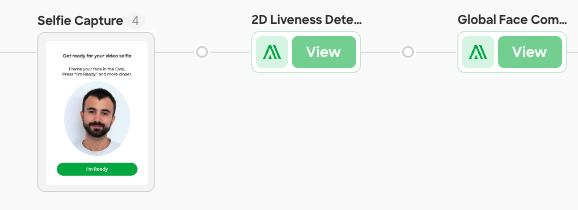
Figure - Selfie Verification Standard
- Selfie Verification Standard(Selfie capture , 2D liveness Detection, Global face comparison ) verifies the user's identity using facial recognition technology.When "Selfie Verification Standard" is selected, all three service nodes will be added to the canvas together, and any unnecessary nodes can be deleted. Refer to "Figure - Selfie Verification Standard" for visual reference.
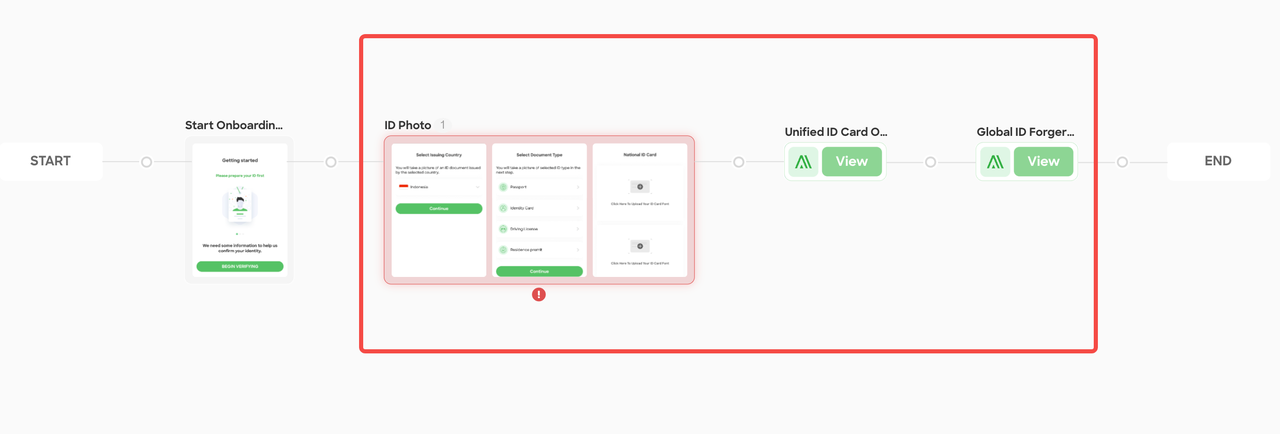
ID Verification
- ID Verification (ID Photo, Unified ID Card OCR, Global ID Forgery) allows real-time verification of customer IDs. Similar to biometric authentication, selecting "ID Verification" adds all three service nodes to the canvas. Refer to "Figure 18 - ID Verification" for visual reference.
ID Photo
-
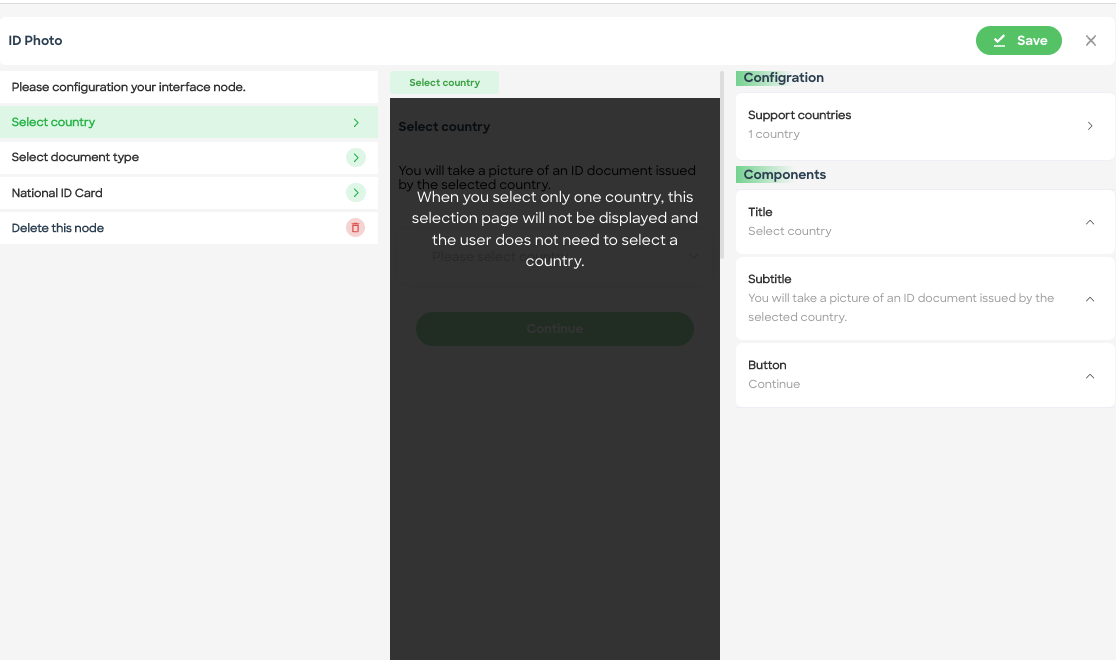
- ID Photo node represents a series of pages where customers can interact and provide ID-related information.
- Users can define the elements on each page, configure business-related settings, and customize labels and styles.Refer to "Figure 20 - ID Photo" for visual reference.
Face Photo
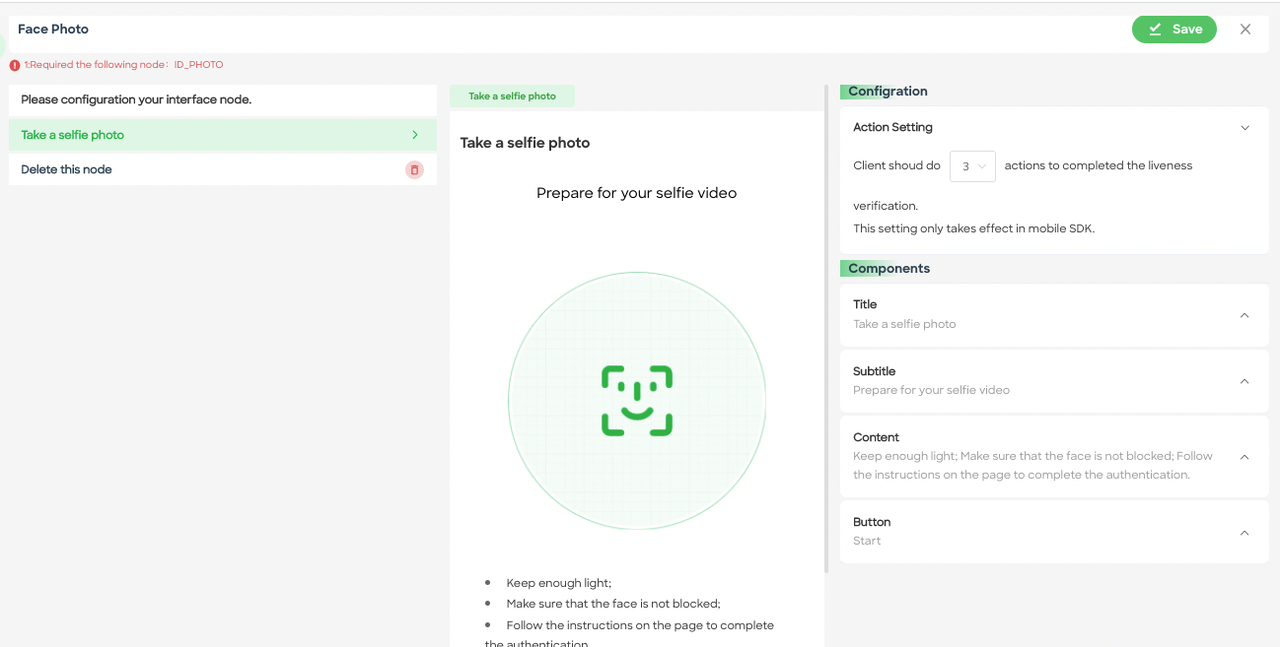
- Face Photo allows you to configure components such as Action Settings, Title, Subtitle, Content, and Button. You can also delete this node if not needed. Refer to "Figure 21 - Face Photo" for visual reference.
End Onboarding
- The End Onboarding node includes pages for the "Decline," "Success," and "Pending" outcomes.
- It is used in conjunction with the "Decision outcomes" node in the Action node to determine the workflow route.Refer to "Figure 22 - End Onboarding" for visual reference.
Action Nodes:
Data:
- The Data node category provides various options for data-related actions in the workflow.
- For example, the "AML watchlist combine" node allows users to run AML screening and monitoring configurations within the workflow.
Decision Outcome:
- The Decision Outcome node determines the outcome of the workflow route.
- Users can choose between "Approve," "Declined," or "Review" as the decision outcomes.
Create and Assign Case:
- The Create and Assign Case node enables users to configure conditions for generating and assigning cases.
- The case policy needs to be published in advance, and further configuration details can be found in the cases policy section.
These nodes allow users to build workflows with specific functionalities and configurations to meet their business and compliance requirements. Each node type offers customization options and plays a crucial role in creating a comprehensive and efficient workflow process.
Updated 3 months ago
