Create Cases Policy
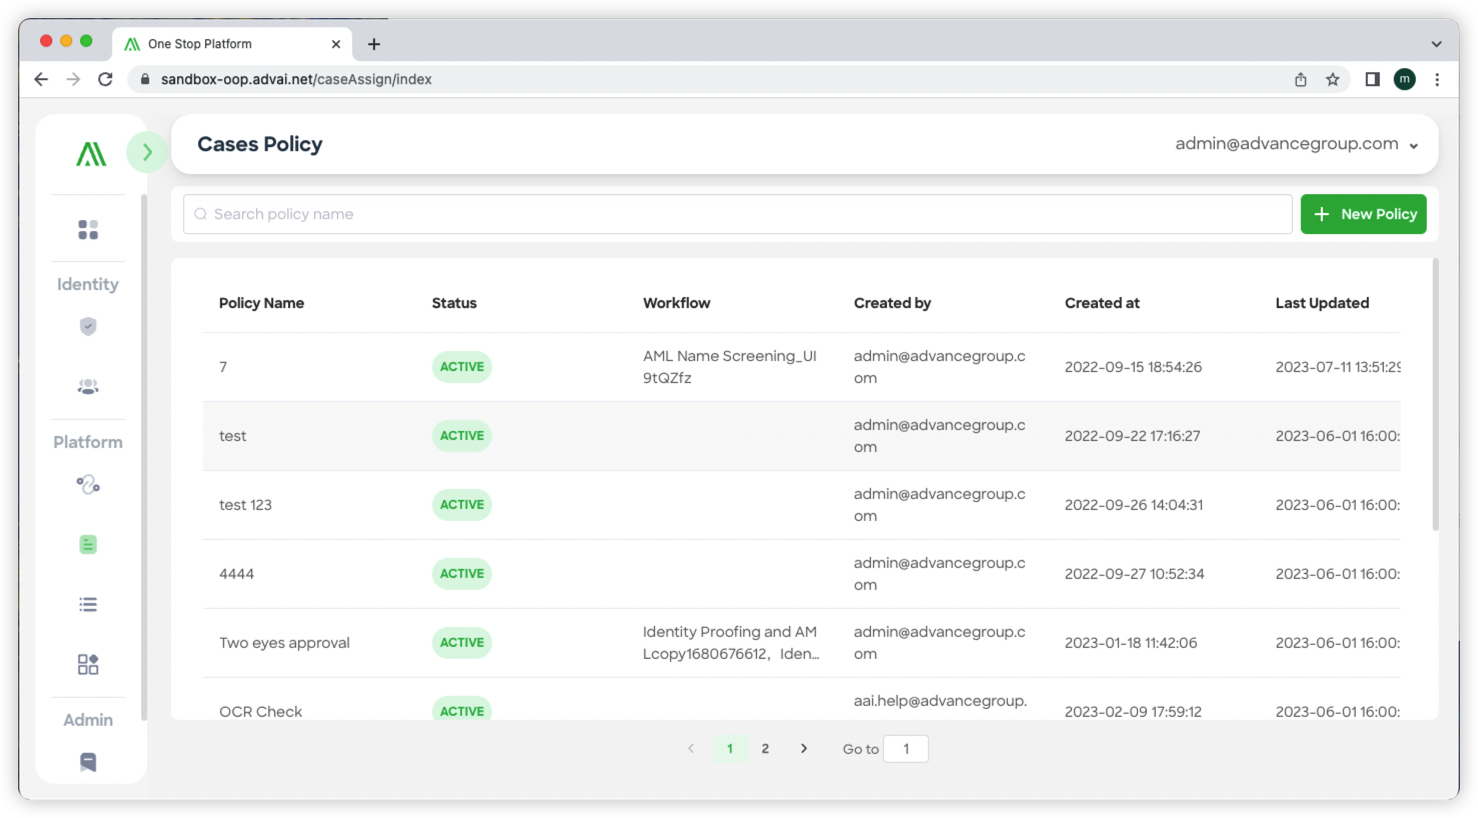
To access the cases policy, simply go to the Cases policy page on your portal:

Figure 1 - Case policy list
Step 1: Accessing Case Review Policy Configuration
To configure the Case Review Policy in One Stop, follow these steps:
- Click the "Case Review Policy" button located in the left column of the One Stop interface.
- This will direct you to the "Case Policy" page, where you can manage and configure your case review policies.
- Refer to "Figure 1 - Case policy list" to get an overview of the displayed policies, including details such as policy name, status, type, creation and update times, creator information, and more.

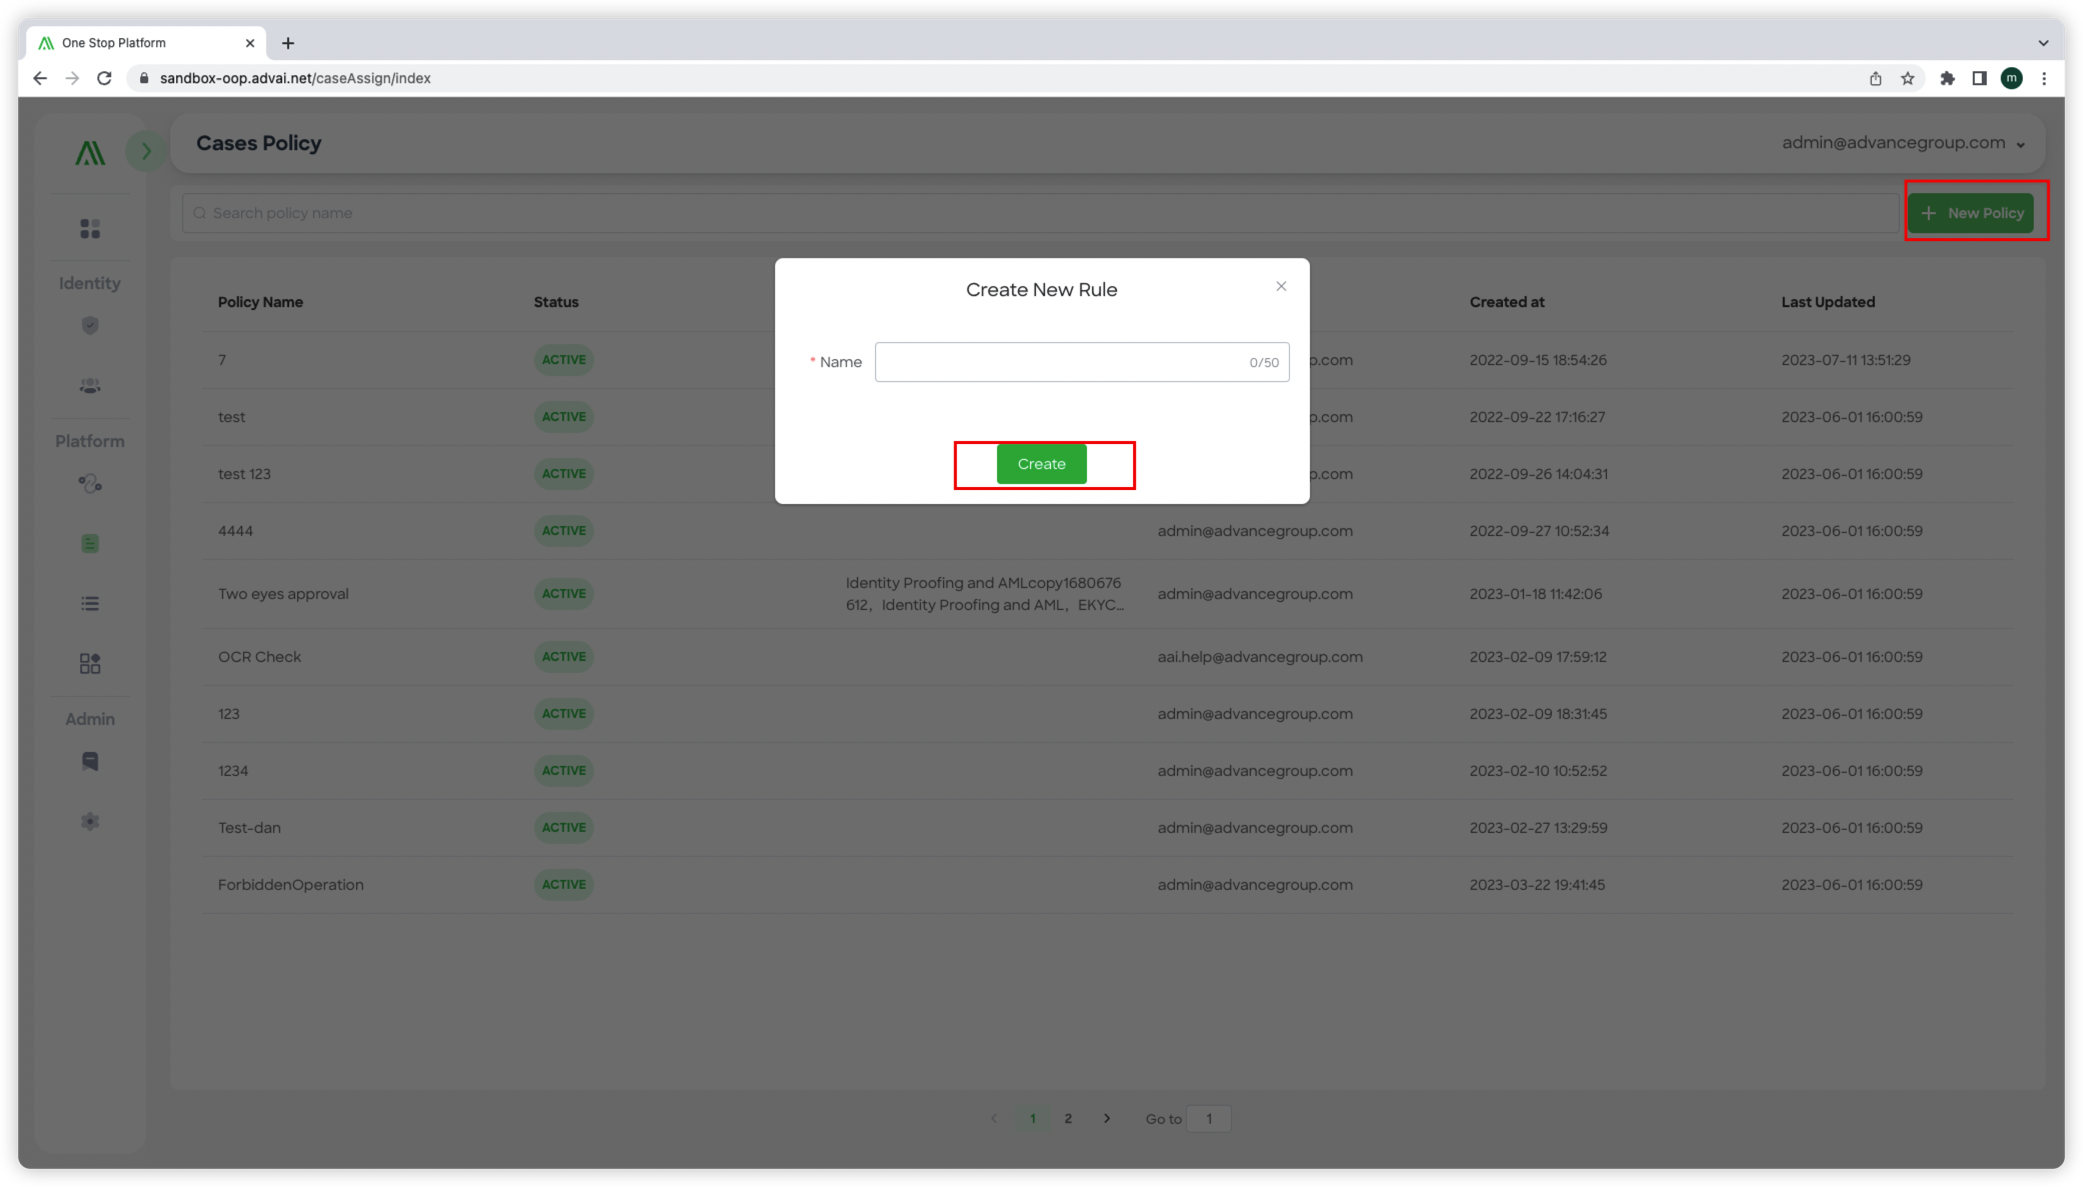
Figure 2 - Pop-up Window of Creating a New Policy
Step 2: Creating a New Policy
- To create a new case review policy, click the "New Policy" button on the "Case Policy" page.This action will take you to the configuration page for the new policy. Refer to "Figure 2 - Pop-up Window of Creating a New Policy" for the appearance of the pop-up window.
- Enter a suitable name for the policy in the designated field.
- Click the "Create" button to proceed with the policy creation.

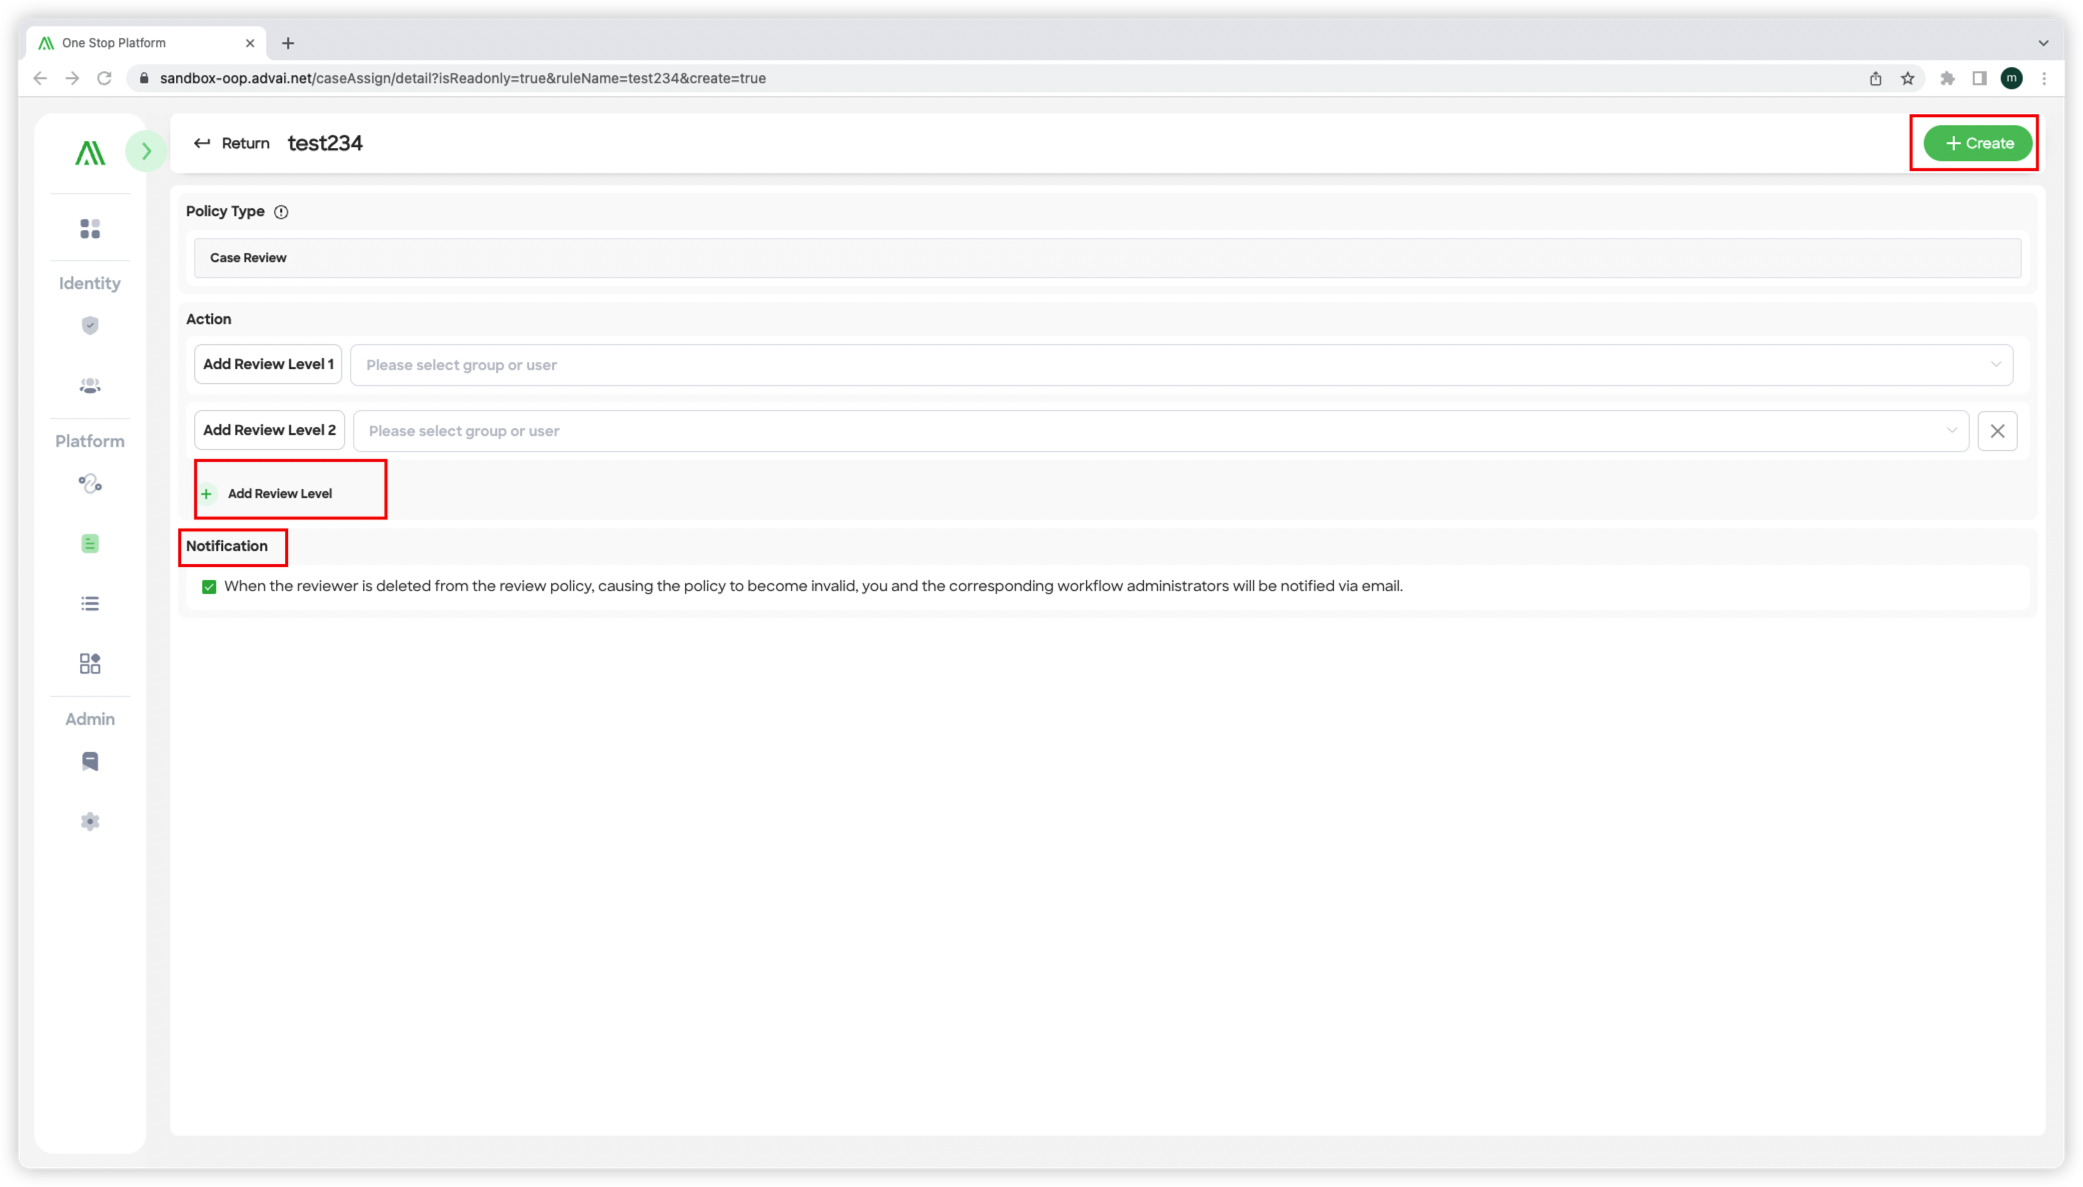
Figure 3 - Case policy configuration
Step 3: Configuring Review Groups or Users
- Select the review groups or individual users for each review level within the policy. Refer to Figure 3 - Case policy configuration
- By default, there are two review levels, but you can add more levels by clicking "Add Review Level" (up to a maximum of five levels).
- Review groups or users assigned to each level will be responsible for reviewing cases at that particular level.
Step 4 : Notification
- When a case policy becomes inactive, an email notification will be sent to the policy creator and the workflow creator who is using this policy. This notification serves as a communication mechanism to inform them about the status change of the policy.
- Policy creators/editors have the flexibility to enable or disable these notifications at any time according to your preference.
- The email notification will include relevant details such as the policy name, the reason for the policy becoming inactive, and any necessary instructions or actions required from the policy or workflow creator.
- By receiving this notification, the policy and workflow creators can stay informed about the status of their policies and take appropriate actions if needed. It helps ensure that they are aware of any changes or updates related to the case policy and can make any necessary adjustments to their workflows or policies accordingly.
Step 7: Finalizing and Activating the Policy
- Once you have entered all the necessary information and made the required selections, click the "Create" button to finalize the policy.
- The policy will then become active and ready for use in the case review process.
By following these steps, you can successfully configure a Case Review Policy within One Stop. This allows you to define the review process, assign review groups or users to different levels, and ensure a structured and efficient case review workflow aligned with your organization's requirements.
Updated 3 months ago
